
Salmon Sushi Bake Recipe That’s Bold and Zesty
A zesty salmon sushi bake recipe delivers all the fun of rolled sushi in a format that feeds a crowd with half the fuss.
This deconstructed approach has become wildly popular because it tastes fantastic and looks absolutely stunning when served.
The dish works beautifully for casual weeknight dinners or when friends come over for game night.
Each spoonful offers a delightful combination of textures and flavors that feel both comforting and exciting at the same time.
The casserole-style presentation means everyone can help themselves without any complicated assembly required.
People who love Japanese-inspired food but feel intimidated by traditional sushi rolling techniques will appreciate how approachable this version is.
The bright, bold flavors make every bite feel like a celebration.
Highlights of Spicy Salmon Sushi Bake
What Builds This Sushi-Inspired Bake
Main Protein:Seasoning for Salmon:Rice Base:Creamy Salmon Coating:Garnish and Finishing Touches:Kitchen Items That Help Achieve Flaky, Creamy Layers
Directions for Salmon Sushi Bake
Prepare Salmon
Preheat the oven to 375°F (190°C). Place 1 lb fresh salmon fillet on a baking sheet. Drizzle the salmon with the following ingredients:
Bake for 12-15 minutes until the salmon flakes easily with a fork.
Season Rice
Mix 2 cups cooked sushi rice with 1 tablespoon rice vinegar and ½ teaspoon salt in a large bowl. Let the rice cool down slightly while your salmon finishes cooking.
Create Spicy Salmon Mixture
Shred the baked salmon using a fork. In a separate bowl, combine the salmon with:
Stir until the salmon is completely coated in the creamy sauce.
Assemble and Bake
Spread the seasoned rice evenly across a baking dish. Top the rice with the creamy spicy salmon mixture. Return the dish to the oven and bake for 10-12 minutes until the top turns golden and starts bubbling.
Garnish and Serve
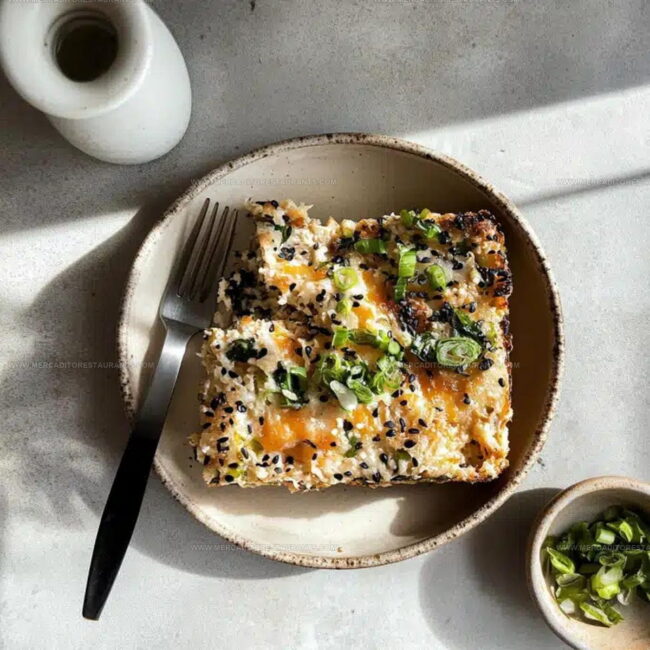
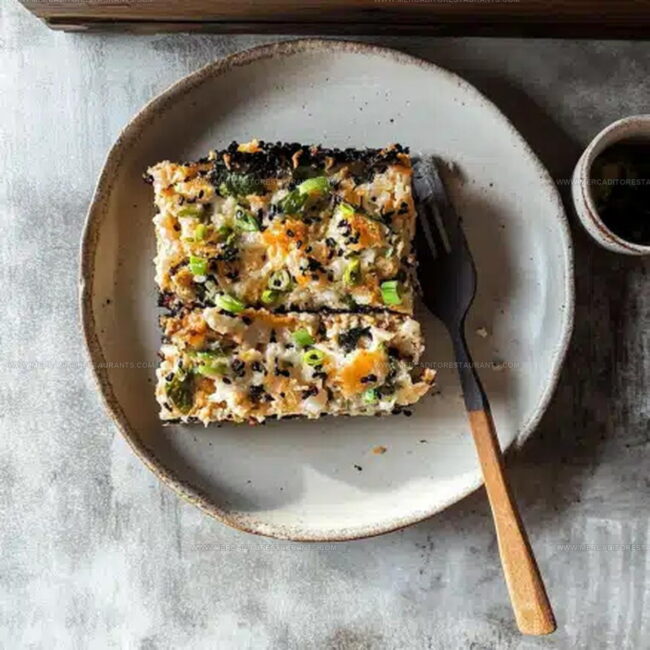
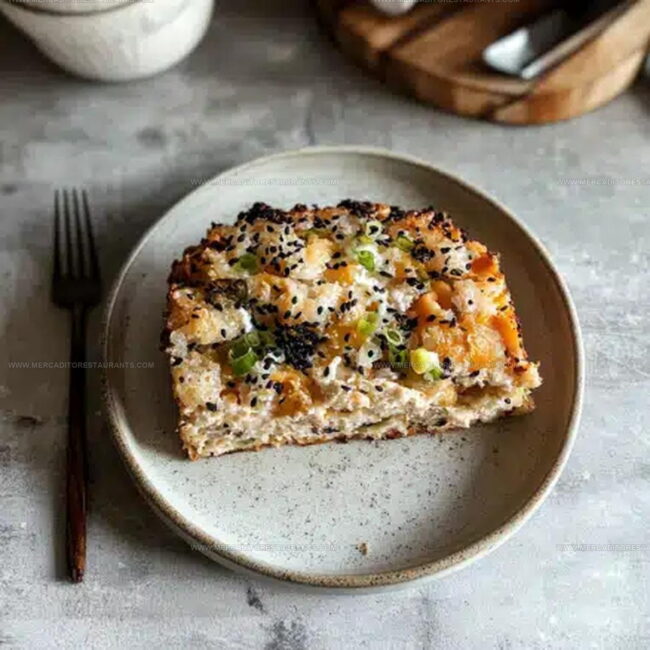
Pull the dish from the oven and add these fresh toppings:
Serve the sushi bake immediately while it’s warm and fragrant.
Final Adjustments For Balanced Spice And Texture
Different Takes For Sushi-Bake Creativity
When This Salmon Bake Becomes The Star Meal
How To Store Layers Without Losing Moisture
Salmon Sushi Bake FAQs For Modern Home Chefs
What type of salmon works best for this recipe?
Wild-caught or fresh salmon fillets are perfect. They deliver rich flavor and flake beautifully when baked.
Can vegetarians enjoy this dish?
Swap salmon for tofu or roasted vegetables to create a delicious plant-based version that follows the same preparation method.
How spicy is this sushi bake?
The sriracha adds a moderate kick. Adjust the amount based on personal heat tolerance – more sriracha means more heat.
Do sushi bakes taste like traditional sushi rolls?
They’re similar but deconstructed. The flavors are familiar, yet the presentation and texture differ from classic sushi rolls.
Is a specific rice necessary?
Short-grain sushi rice works best because it’s stickier and holds together nicely. Regular rice can work in a pinch.
How challenging is this recipe for home cooks?
It’s beginner-friendly! Basic cooking skills and following steps carefully will result in a delicious meal.

Zesty Salmon Sushi Bake Recipe
- Total Time: 32-37 minutes
- Yield: 4 1x
Description
Salmon Sushi Bake brings restaurant-quality flavors straight to your kitchen with minimal fuss. Layers of seasoned salmon, creamy sauce, and crispy nori wrap create a delicious meal that feels like a special treat without complicated techniques.
Ingredients
Main Proteins:
- 1 lb fresh salmon fillet, skin removed
Supporting Carbohydrates:
- 2 cups cooked sushi rice (or short-grain rice)
- 1 sheet nori (optional, for serving)
Seasonings and Garnishes:
- 1 tablespoon olive oil
- 1 tablespoon soy sauce
- 1 tablespoon sriracha sauce
- 1 teaspoon sesame oil
- 1 tablespoon rice vinegar
- ½ teaspoon salt
- ¼ cup mayonnaise
- ¼ teaspoon garlic powder
- 1 avocado, sliced
- ¼ cup chopped green onions
- 1 tablespoon sesame seeds (optional, for garnish)
Instructions
- Preheat the oven to 375°F (190°C). Gently place 1 lb fresh salmon fillet on a baking sheet, ensuring the skin is completely removed.
- Drizzle 1 tablespoon olive oil, 1 tablespoon soy sauce, 1 tablespoon sriracha sauce, and 1 teaspoon sesame oil over the salmon. Carefully spread the liquids to coat the entire fillet evenly.
- Roast the salmon for precisely 12-15 minutes until it becomes tender and separates effortlessly with a fork. Check the center to ensure complete cooking.
- In a large mixing bowl, combine 2 cups cooked sushi rice with 1 tablespoon rice vinegar and ½ teaspoon salt. Gently fold the ingredients to distribute flavors thoroughly.
- After removing the salmon from the oven, use a fork to break the fillet into small, uniform flakes. Mix in ¼ cup mayonnaise and ¼ teaspoon garlic powder until the salmon becomes creamy and well-coated.
- Transfer the seasoned rice into a clean baking dish, pressing it down to create an even layer approximately ½ inch thick.
- Spread the creamy salmon mixture directly over the rice, covering the entire surface uniformly.
- Return the dish to the 375°F (190°C) oven and bake for an additional 10-12 minutes until the top turns golden and slightly crispy.
- Carefully remove the baking dish from the oven. Artfully arrange 1 sliced avocado, ¼ cup chopped green onions, and optional 1 tablespoon sesame seeds across the surface.
- Optionally, serve with a crisp nori sheet torn into smaller pieces. Plate immediately while the dish remains warm and fragrant.
Notes
- Always choose fresh, high-quality salmon for the best flavor and texture in your sushi bake.
- Use a meat thermometer to ensure the salmon reaches an internal temperature of 145°F for perfect doneness.
- Experiment with different spicy sauces like gochujang or sriracha to customize the heat level to your preference.
- For a lighter version, swap regular mayonnaise with Greek yogurt or low-fat mayo to reduce calories without sacrificing creaminess.
- Prep Time: 10 minutes
- Cook Time: 22-27 minutes
- Category: Baked
- Method: Baking
- Cuisine: Japanese
Nutrition
- Serving Size: 4
- Calories: 430 kcal
- Sugar: 2 g
- Sodium: 530 mg
- Fat: 27 g
- Saturated Fat: 4 g
- Unsaturated Fat: 22 g
- Trans Fat: 0 g
- Carbohydrates: 23 g
- Fiber: 4 g
- Protein: 28 g
- Cholesterol: 65 mg
Daniel Navarro
Culinary Content Director
Expertise
Mexican-inspired Menus, Seasonal Restaurant Specials, Shared Plate Dining, Tequila Pairings, Chef-driven Recipes
Education
Daniel writes about bold flavors, chef-driven dishes, and the kind of restaurant moments that turn tacos, mezcal, and shared plates into a night worth repeating.