Roasted Garlic Hummus Veggie Bowl Recipe for Fresh Lunches
Roasted garlic hummus veggie bowls offer pure comfort in every delightful bite.
Mediterranean-inspired meals like this prove simple ingredients can become extraordinary culinary experiences.
Colorful vegetables and creamy textures merge into a satisfying lunch or dinner solution that feels both nourishing and exciting.
Packed with robust flavors and nutrient-dense components, these bowls provide balanced nutrition without compromenting taste or enjoyment.
Plant-based eating never looked so gorgeous or felt so satisfying as when arranged in a beautiful bowl featuring roasted garlic hummus as its starring component.
Dive into this delectable recipe that promises to revolutionize your midday meal routine – your palate will thank you.
Why Roasted Garlic Hummus Veggie Bowl Shines

Core Ingredients in Roasted Garlic Hummus Veggie Bowl
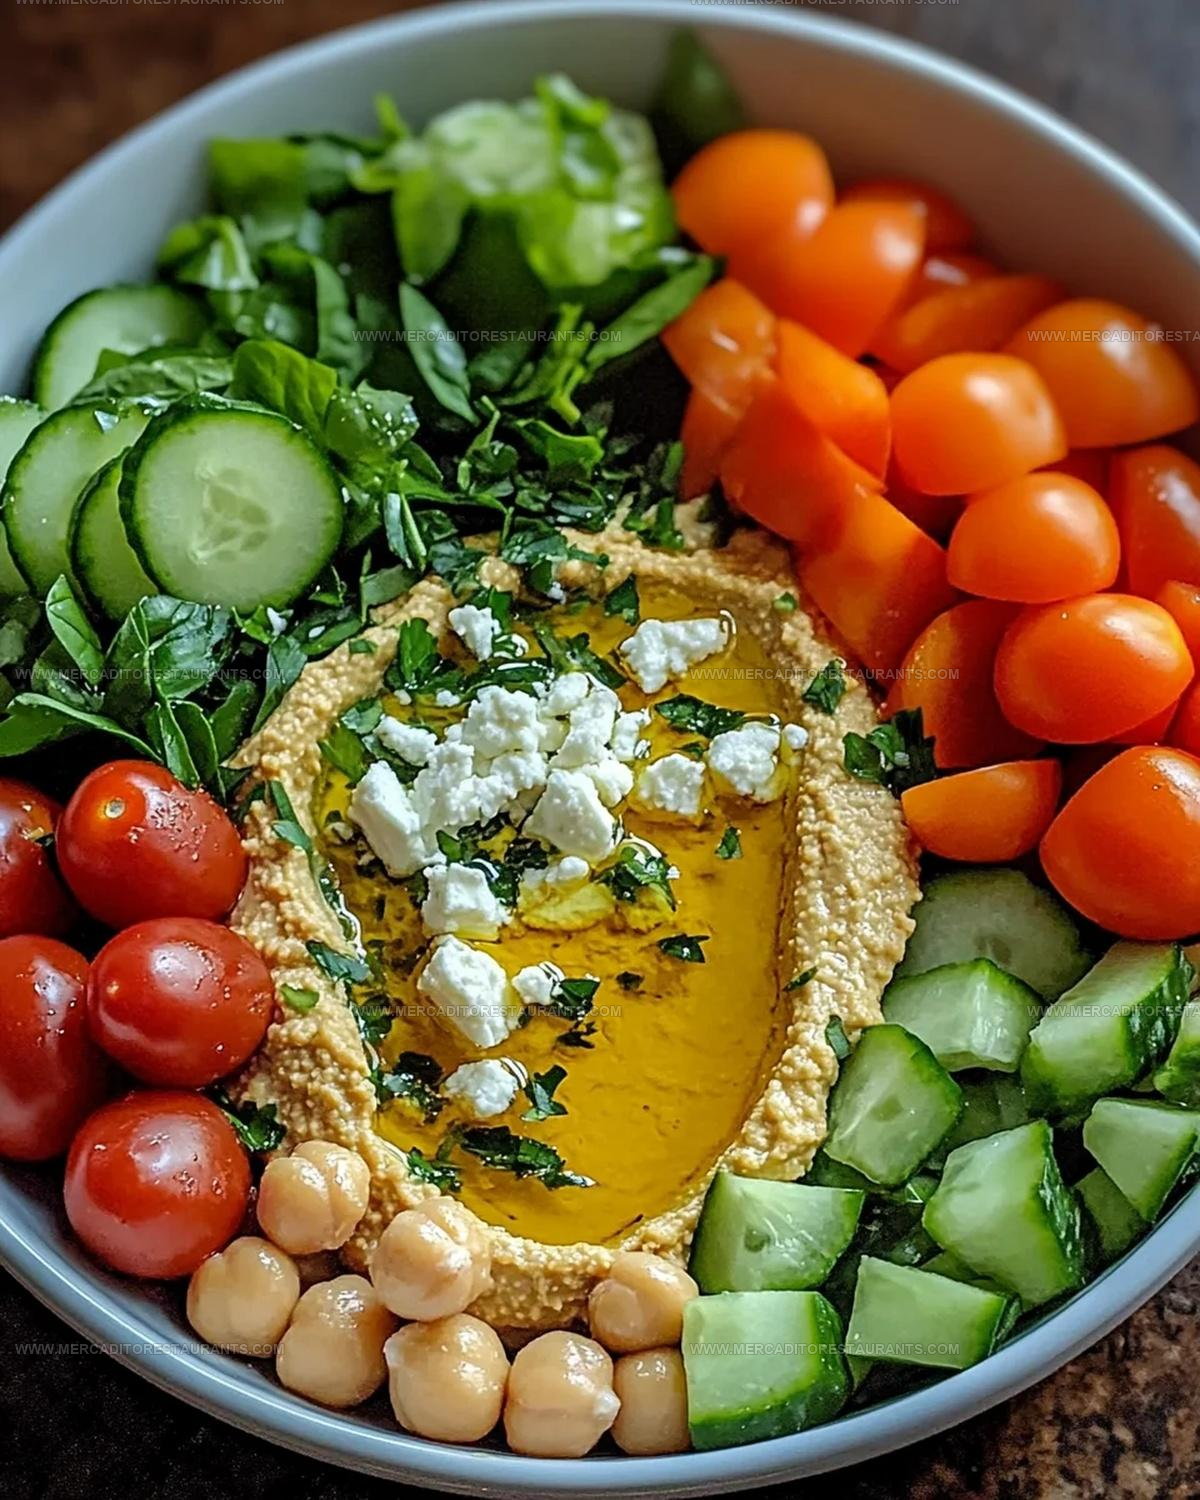
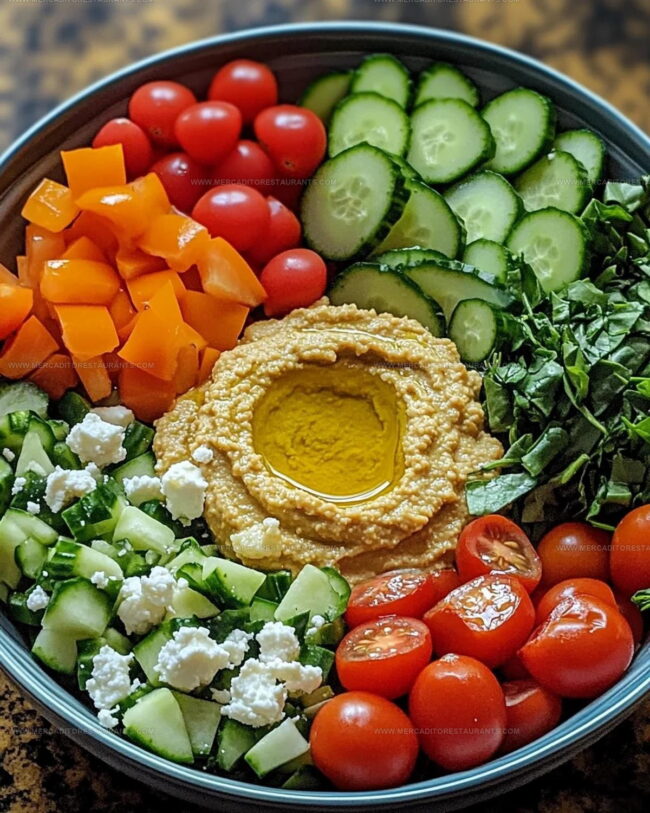
Base Ingredients:Hummus Ingredients:Veggie Bowl Toppings:What Kitchen Tools Do You Need for Roasted Garlic Hummus Veggie Bowl
How To Make Roasted Garlic Hummus Veggie Bowl
Roast Garlic
Crank the oven to 400°F. Grab those 4 whole garlic cloves and set them on a piece of aluminum foil. Drizzle 1 tablespoon olive oil over the cloves and wrap them up snug. Roast for 20-25 minutes until the garlic turns super soft and fills the kitchen with an amazing aroma. Let them cool down just enough to handle.
Blend Hummus
Peel the roasted garlic and drop those tender cloves into the food processor. Add these ingredients:
Blend everything until smooth. If the mixture seems too thick, splash in water one tablespoon at a time to get a creamy consistency.
Prepare Quinoa Base
Scoop 1 cup cooked quinoa into each serving bowl as a hearty foundation.
Add Fresh Vegetables
Scatter these fresh ingredients across the quinoa:
Top and Finish
Dollop a generous spoonful of roasted garlic hummus over the veggies. Sprinkle 1/4 cup crumbled feta cheese if you’re feeling fancy. Drizzle a bit more olive oil and garnish with chopped fresh parsley. Serve immediately and savor every colorful bite!
Things Worth Knowing For Roasted Garlic Hummus Veggie Bowl
Adaptable Ideas for Roasted Garlic Hummus Veggie Bowl
Mediterranean Spice Remix: Add za’atar and smoked paprika to your hummus for a bolder Mediterranean flavor profile, swapping regular olive oil for extra virgin olive oil to enhance the herbal notes.
Protein Power Bowl: Replace quinoa with brown rice or farro, and add grilled chicken or baked tofu cubes to boost protein content while keeping the core vegetable mix intact.
Vegan Cheese Alternative: Skip traditional feta and sprinkle nutritional yeast or cashew-based parmesan for a completely plant-based version that maintains creamy texture and tangy flavor.
Gluten-Free Green Edition: Confirm all ingredients are certified gluten-free, swap quinoa for quinoa-amaranth blend, and verify tahini brand doesn’t cross-contaminate with gluten products.
Best Serving Options for Roasted Garlic Hummus Veggie Bowls
Roasted Garlic Hummus Veggie Bowl Storage Advice
Roasted Garlic Hummus Veggie Bowl Frequently Asked Questions
What makes roasted garlic different from raw garlic?
Roasting transforms garlic’s sharp flavor into a mellow, slightly sweet taste that’s much smoother and less intense than raw garlic.
Can someone with dairy sensitivity still enjoy this recipe?
Absolutely – just skip the feta cheese, and the dish remains completely delicious and nutritious.
How long will the homemade hummus stay fresh?
Your roasted garlic hummus will keep nicely in a sealed container inside the refrigerator for 4-5 days.
Do I need any special equipment to make this recipe?
A food processor helps create smooth hummus, but a blender or hand immersion blender will also work well.
Is this recipe considered vegan?
The basic recipe is vegan, but adding feta cheese makes it vegetarian instead. Simply omit the cheese for a fully plant-based meal.
Can this recipe be prepared ahead of time?
Definitely! Cook your quinoa, chop vegetables, and make hummus in advance, then assemble bowls right before serving.

Roasted Garlic Hummus Veggie Bowl Recipe
- Total Time: 30-35 minutes
- Yield: 2 1x
Description
Dive into a Mediterranean-inspired roasted garlic hummus veggie bowl that brings fresh flavors right to your plate. Creamy homemade hummus nestled with roasted vegetables makes lunch feel like a delicious adventure in healthy eating.
Ingredients
Main Components:
- 1 cup quinoa
- 1 cup chickpeas
- 1 cup cherry tomatoes
- 1 cup baby spinach or mixed greens
- 1 cucumber
- 1 bell pepper
Supporting Components:
- 4 cloves garlic
- 2 tablespoons tahini
- 2 tablespoons olive oil
- 2 tablespoons lemon juice
Seasoning Components:
- 0.25 cup feta cheese
- Salt
- Pepper
- Fresh parsley
Instructions
- Preheat the oven to 400°F. Wrap whole garlic cloves in aluminum foil, drizzling 1 teaspoon olive oil over them before sealing the packet tightly.
- Roast the garlic for 25 minutes until soft and golden. Remove from oven and let cool for 5 minutes.
- Squeeze roasted garlic cloves from their skins directly into the food processor.
- Add 1 cup drained chickpeas, 2 tablespoons tahini, 2 tablespoons olive oil, 2 tablespoons lemon juice, and a pinch of salt and pepper to the processor.
- Blend the mixture for 2-3 minutes until completely smooth. Add water 1 tablespoon at a time if the hummus seems too thick.
- Cook 1 cup quinoa according to package instructions until fluffy and tender.
- Dice 1 cucumber and 1 bell pepper into small, uniform cubes.
- Halve 1 cup cherry tomatoes and roughly chop fresh parsley.
- Divide the quinoa evenly between four serving bowls as a base layer.
- Top each quinoa base with diced cucumber, bell pepper, and halved tomatoes.
- Spread 3-4 tablespoons of roasted garlic hummus over the vegetables.
- Sprinkle ¼ cup crumbled feta cheese and chopped parsley on top.
- Drizzle an extra teaspoon of olive oil over each bowl just before serving.
Notes
- Roast garlic low and slow to develop deep, mellow flavor without burning.
- For smoother hummus, remove chickpea skins by gently rubbing them between your fingers before blending.
- Make this dish gluten-free by ensuring your tahini and quinoa are certified gluten-free.
- Prep vegetables ahead of time to create a quick weeknight meal that comes together in minutes.
- Prep Time: 10 minutes
- Cook Time: 20-25 minutes
- Category: Roasted
- Method: Roasting
- Cuisine: Mediterranean
Nutrition
- Serving Size: 2
- Calories: 390 kcal
- Sugar: 4 g
- Sodium: 280 mg
- Fat: 22 g
- Saturated Fat: 3 g
- Unsaturated Fat: 18 g
- Trans Fat: 0 g
- Carbohydrates: 35 g
- Fiber: 9 g
- Protein: 14 g
- Cholesterol: 10 mg
Isabella Romero
Hospitality & Beverage Editor
Expertise
Cocktail Culture, Tequila and Mezcal Knowledge, Guest Experience Writing, Restaurant Trends, Event Dining Guides
Education
- Program: B.A. in Hospitality Management
- Focus: Studied hospitality through a program built around theory and application, with practical preparation for restaurant and guest-experience careers in Chicago’s hospitality industry.
Wine & Spirit Education Trust (WSET)Isabella brings together cocktails, food culture, social dining, and the thoughtful details that make a meal feel memorable. Her content blends atmosphere, flavor, and hospitality in a warm, polished style that helps readers connect with the full dining experience, from the first sip to the last bite.