Recipe for Perfectly Crusted Roast Beef Tenderloin with Reverse Sear
Roast beef tenderloin reverse sear recipe offers one of the most foolproof methods for achieving perfectly cooked meat from edge to edge.
Instead of high heat followed by low, the process flips convention on its head by slowly warming before finishing with an intense sear.
What makes it so appealing is how forgiving the technique becomes compared to traditional approaches that often leave home cooks guessing.
Precision meets simplicity when gentle heat does most of the work before a quick blast creates that gorgeous crust everyone craves.
Special occasions call for something remarkable, and few dishes command attention quite like a beautifully prepared centerpiece that looks as stunning as it tastes.
Confidence in the kitchen grows naturally when results consistently turn out restaurant-worthy without requiring professional training or fancy equipment.
Success becomes almost guaranteed when you follow a method designed to eliminate guesswork and deliver impressive outcomes every single time.
Why You’ll Love Reverse Sear Beef Tenderloin
What Goes Into Reverse-Seared Beef Tenderloin
Main Protein:Seasoning Blend:Aromatic Enhancers:Cooking Fat:Tools for Reverse Searing Beef Tenderloin
Reverse-Sear Cooking Guide for Beef Tenderloin
Prepare the Oven
Set the oven to 225F and grab a baking sheet with a wire rack. This low and slow method helps cook the beef evenly.
Season the Meat
Pat the 2-pound beef tenderloin completely dry with paper towels. Create a flavor-packed seasoning mixture:
Rub the seasonings all over the meat, making sure every inch gets covered.
Initial Roasting
Place the seasoned tenderloin on the wire rack. Slide the baking sheet into the 225F oven. Cook until the meat’s internal temperature hits exactly 120F, which takes about 45-60 minutes.
Searing the Exterior
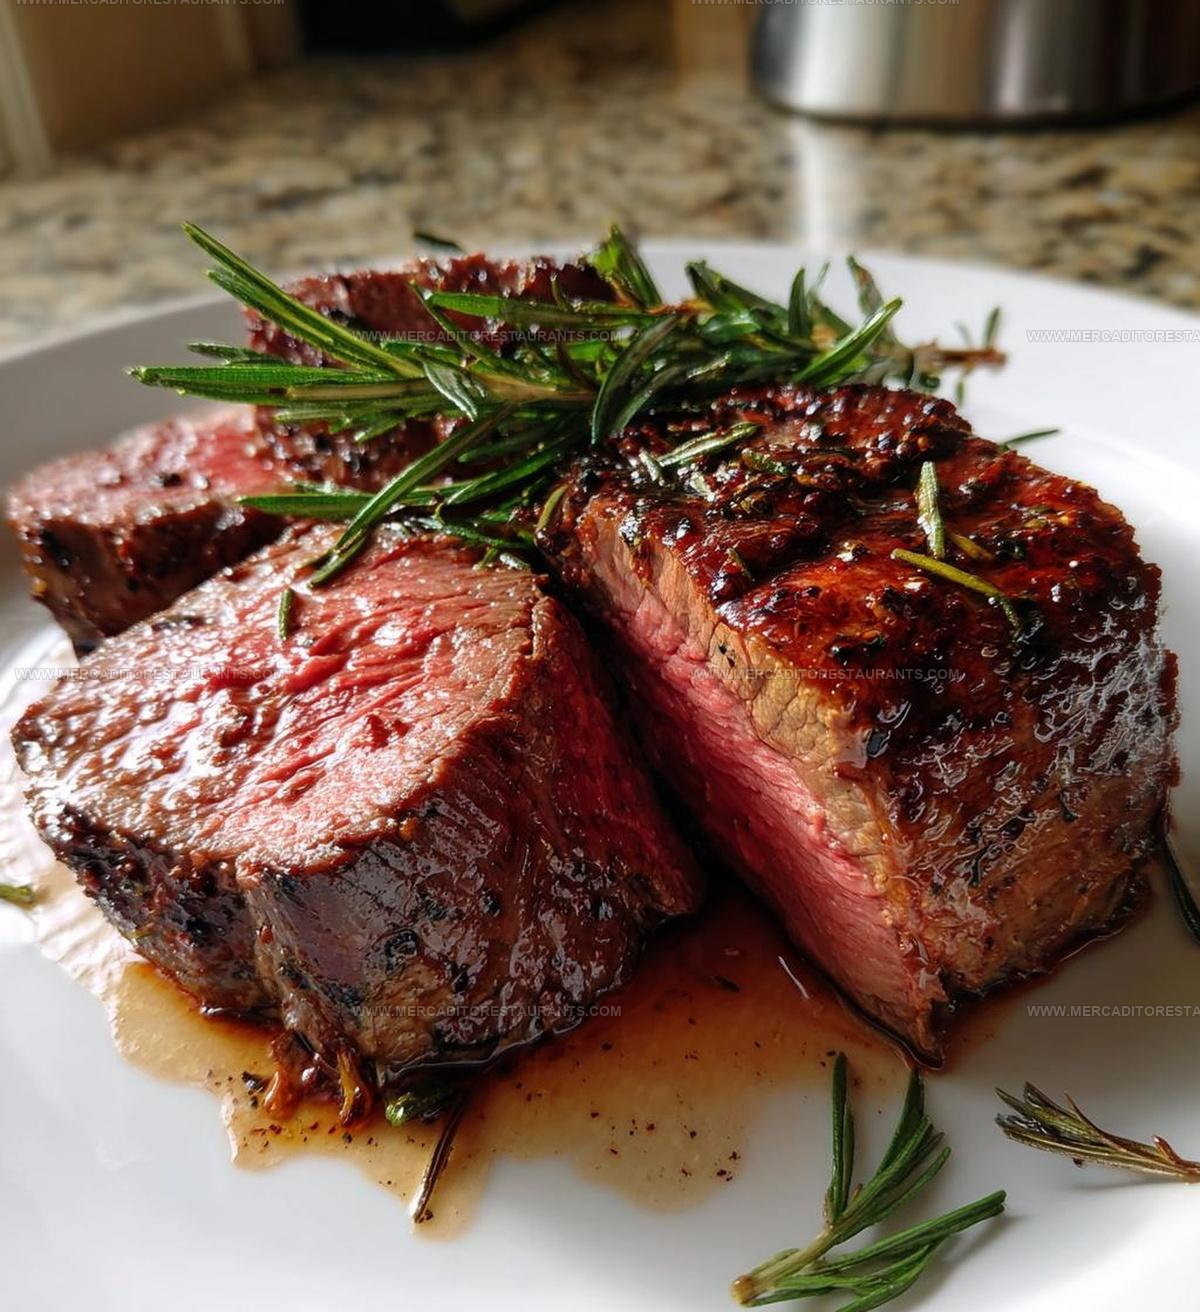
Pull the beef from the oven and let it rest for 20 minutes. Meanwhile, heat 2 tablespoons of olive oil in a skillet over high heat. Carefully sear the tenderloin on all sides for 2-3 minutes until a beautiful golden-brown crust forms.
Final Resting and Slicing
Remove the beef from the skillet and let it rest another 10 minutes. This helps the juices redistribute throughout the meat. Slice against the grain and serve warm.
Kitchen Know-How for Reverse Sear Beef Tenderloin
Reverse-Sear Beef Tenderloin Variations for Perfect Results
How to Serve Reverse-Seared Beef Tenderloin
How to Store Reverse-Seared Beef Tenderloin
Reverse Sear Beef Tenderloin Q&A
Can I prepare the tenderloin ahead of time?
Seasoning the beef the night before helps develop deeper flavors, and you can let it sit in the refrigerator uncovered to help create a better crust.
What if my meat thermometer breaks?
Check the internal temperature by pressing the meat – rare feels soft, medium has slight resistance, and well-done feels firm when pressed.
Does the beef cut matter for this method?
Beef tenderloin works best because it’s naturally tender, but you could use other lean cuts like sirloin tip or top round with similar techniques.
How thick should the tenderloin be?
Aim for a consistent cut around 2-3 inches thick to ensure even cooking and beautiful results across the entire roast.
Can vegetarians adapt this technique?
While this specific recipe is for beef, similar reverse sear methods work wonderfully for thick vegetable cuts like cauliflower steaks or portobello mushrooms.
What makes reverse sear different from traditional roasting?
Reverse searing allows for more precise temperature control, resulting in a more evenly cooked piece of meat with a perfect exterior crust.

Roast Beef Tenderloin Reverse Sear Recipe
- Total Time: 1 hour 36 minutes
- Yield: 4 1x
Description
Roast beef tenderloin reverse sear delivers melt-in-your-mouth perfection right from your kitchen. Perfectly seasoned and slowly roasted, this technique ensures a juicy, tender centerpiece that will wow your dinner guests.
Ingredients
Main Ingredients:
- 2 pounds beef tenderloin
Supporting Ingredients:
- 1 tablespoon salt
- 1 tablespoon black pepper
Aromatics:
- 2 tablespoons olive oil
- 4 cloves garlic, minced
- 2 sprigs rosemary, chopped
Instructions
- Warm your oven to 225F, creating the perfect low-temperature environment for an even roast.
- Massage 1 tablespoon salt, 1 tablespoon black pepper, 4 minced garlic cloves, and chopped rosemary sprigs all over your 2-pound beef tenderloin, ensuring complete coverage.
- Arrange the seasoned tenderloin on a wire rack positioned over a baking sheet, which allows heat to circulate evenly.
- Slide the tenderloin into the 225F oven and monitor its internal temperature, removing it precisely when it reaches 120F – approximately 45-60 minutes depending on thickness.
- Transfer the tenderloin to a cutting board and let it relax undisturbed for 20 minutes, allowing internal juices to redistribute.
- Heat 2 tablespoons olive oil in a cast-iron skillet until it’s scorching hot – the surface should be shimmering and nearly smoking.
- Carefully place your rested tenderloin in the skillet, searing each side for 1-2 minutes to develop a rich, caramelized exterior.
- Rest the beef again for 10 minutes, then slice against the grain into elegant, tender portions ready to serve.
Notes
- Let the beef come to room temperature before seasoning to ensure even cooking.
- Use a meat thermometer for precise doneness and avoid overcooking the tender cut.
- Pat the beef completely dry with paper towels before seasoning to help create a perfect golden-brown crust during searing.
- Choose a thick-cut tenderloin at least 2 inches wide for the best reverse sear technique and consistent results.
- Prep Time: 10 minutes
- Cook Time: 1 hour 6 minutes
- Category: Roasted
- Method: Roasting
- Cuisine: American
Nutrition
- Serving Size: 4
- Calories: 284 kcal
- Sugar: 0 g
- Sodium: 1166 mg
- Fat: 18 g
- Saturated Fat: 5 g
- Unsaturated Fat: 12 g
- Trans Fat: 0.2 g
- Carbohydrates: 1 g
- Fiber: 0.3 g
- Protein: 27 g
- Cholesterol: 80 mg
Isabella Romero
Hospitality & Beverage Editor
Expertise
Cocktail Culture, Tequila and Mezcal Knowledge, Guest Experience Writing, Restaurant Trends, Event Dining Guides
Education
- Program: B.A. in Hospitality Management
- Focus: Studied hospitality through a program built around theory and application, with practical preparation for restaurant and guest-experience careers in Chicago’s hospitality industry.
Wine & Spirit Education Trust (WSET)Isabella brings together cocktails, food culture, social dining, and the thoughtful details that make a meal feel memorable. Her content blends atmosphere, flavor, and hospitality in a warm, polished style that helps readers connect with the full dining experience, from the first sip to the last bite.