Hearty Pierogi Casserole Kielbasa Recipe for Dinner
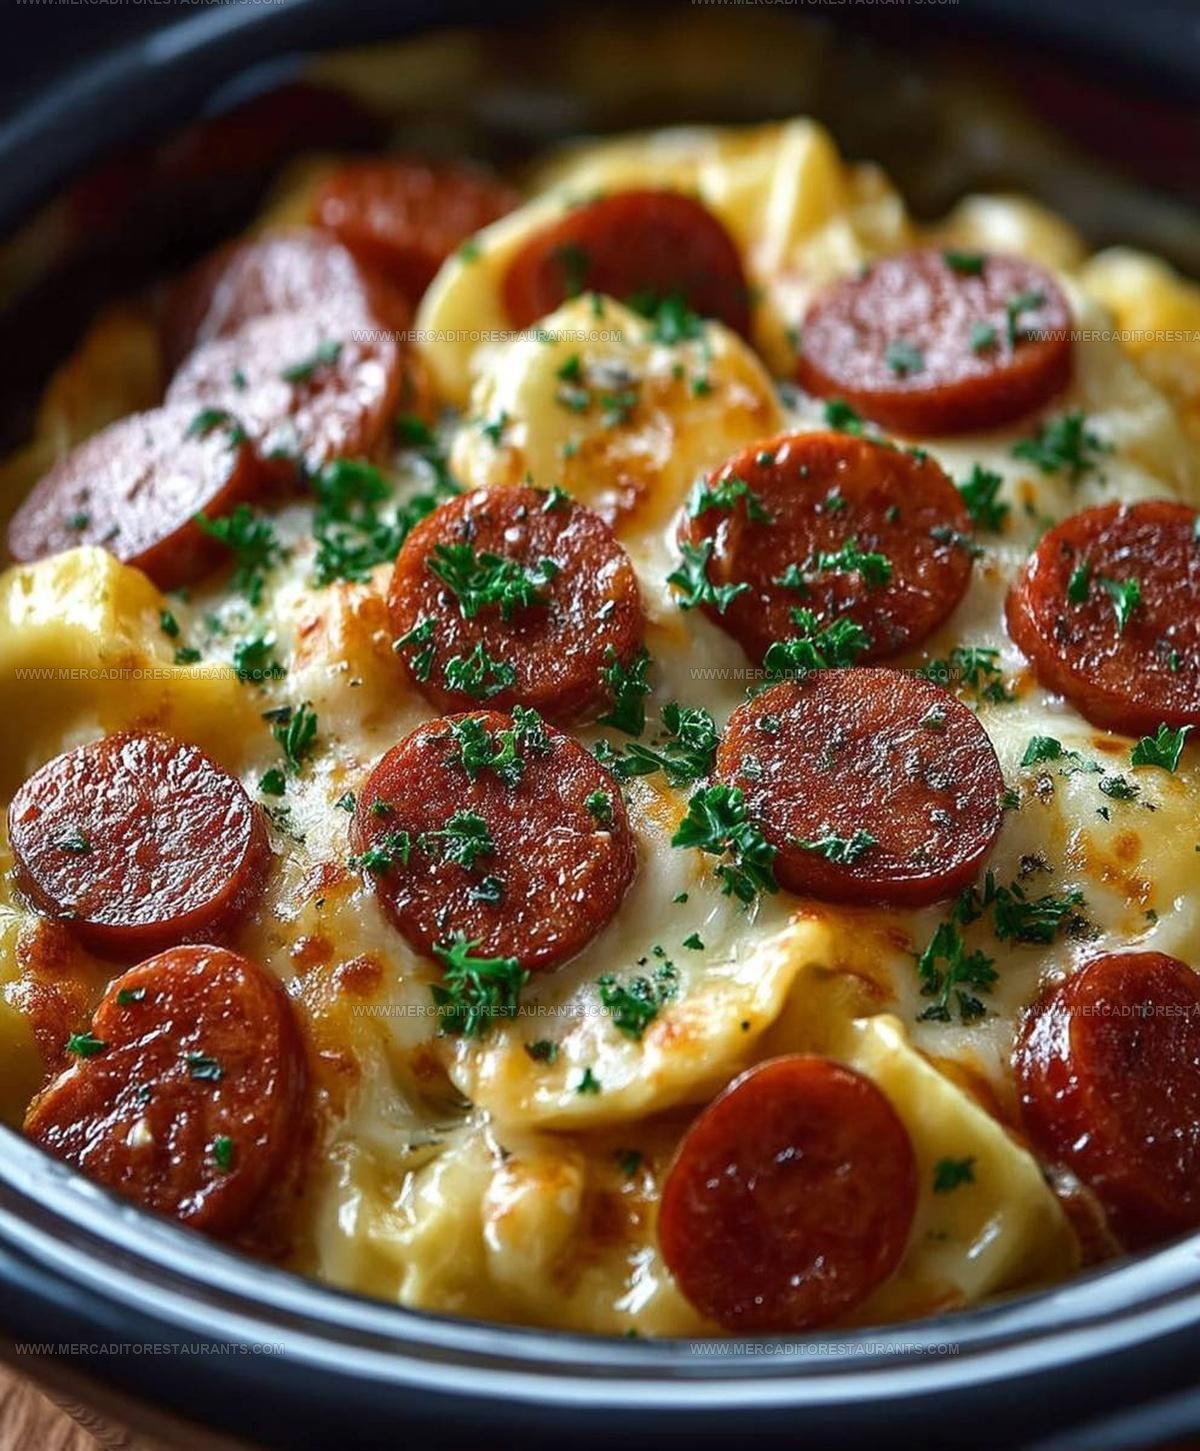
Pierogi casserole kielbasa recipe combines all the comfort of traditional Polish dumplings with the convenience of a one-pan dinner that feeds a crowd.
Rich, satisfying flavors come together in a dish that feels both familiar and exciting, perfect for busy weeknights when time is short but appetite is hearty.
Layers of tender textures meld beautifully with smoky, savory notes that make every bite deeply satisfying.
Families often find themselves reaching for seconds because the combination hits all the right notes without any fuss.
Cold weather calls for meals that warm you from the inside out, and few dishes deliver that cozy feeling quite so well.
Whether planning a casual weeknight meal or hosting friends for dinner, this recipe works for any occasion where good food matters.
When you need something dependable that always delivers smiles around the table, this hearty dish never disappoints.
Why Pierogi Casserole with Kielbasa Comforts
The Ingredients Behind Pierogi Casserole with Kielbasa
Meat Base:Potato Base:Creamy Sauce Components:Seasoning Blend:Cheese and Topping:Tools to Assemble Pierogi Casserole
Complete Assembly Guide for Pierogi Casserole with Kielbasa

Brown The Kielbasa
Heat a large skillet over medium heat. Drop in the 1 pound kielbasa sausage sliced into 1/4-inch rounds. Sizzle and stir these rounds until they turn golden and slightly crisp, about 5-7 minutes. Scoop out the meat and set aside, keeping those delicious fat drippings in the pan.
Sauté Onions And Garlic
Toss the chopped large onion into the same skillet. Let them dance around until soft and translucent, roughly 5-7 minutes. Add the 2 minced garlic cloves and let them get fragrant for about 1 minute. Return the kielbasa to the pan and mix everything together.
Create The Creamy Sauce
Grab a large mixing bowl and whisk together these ingredients:
Sprinkle in the seasonings:
Stir until smooth and taste for seasoning.
Layer The Casserole
Crank the oven to 350F. Grease a 9×13 inch baking dish. Start layering your ingredients:
Repeat these layers one more time.
Optional Crispy Topping
Melt 2 tablespoons butter. If you’re using bread crumbs, mix 1/4 cup into the melted butter. Sprinkle this buttery mixture across the top of the casserole.
Bake The Casserole
Cover the dish with aluminum foil. Slide into the 350F oven and bake for 30 minutes. Remove the foil and continue baking 15-20 minutes until bubbly and the cheese turns golden.
Rest And Serve
Pull the casserole from the oven and let it rest 10 minutes. If you want, sprinkle 2 tablespoons chopped fresh parsley on top. Serve this hearty dish steaming hot straight from the baking dish.
Which Tips Improve Pierogi Casserole with Kielbasa
Which Pierogi Casserole Kielbasa Variations Are Comforting
Comfort Serving Suggestions for Pierogi Casserole with Kielbasa
How to Store Pierogi Casserole with Kielbasa
Pierogi Casserole with Kielbasa FAQs
Are pierogies the secret to this casserole’s deliciousness?
Pierogies create the perfect base, absorbing all the rich, savory flavors while adding a hearty Polish-inspired texture to the dish.
Can I use a different type of sausage instead of kielbasa?
Polish kielbasa gives this casserole its authentic flavor, but you could substitute smoked sausage if needed. Just ensure it’s a robust, flavorful sausage that will stand up to the creamy sauce.
How do I know when the casserole is fully cooked?
Look for bubbling edges, golden-brown cheese, and a slightly crispy top. The casserole should be hot throughout and the cheese completely melted.
Is this dish good for feeding a crowd?
Absolutely! This casserole easily serves 6-8 people and is perfect for potlucks, family gatherings, or weeknight dinners.
Can I prepare this casserole ahead of time?
Assemble the casserole earlier in the day, cover, and refrigerate. When ready to serve, bake as directed, adding a few extra minutes to the cooking time.

Pierogi Casserole Kielbasa Recipe
- Total Time: 1 hour 3 minutes – 1 hour 10 minutes
- Yield: 6 1x
Description
Pierogi casserole combines classic Polish comfort with hearty kielbasa in a simple, delicious one-dish meal that brings warmth to your dinner table. Loaded with cheesy potatoes, tender sausage, and a golden-brown crust, this crowd-pleasing recipe comes together quickly for a satisfying family feast.
Ingredients
Main Ingredients:
- 1 pound kielbasa sausage
- 1 (16 ounce) package frozen pierogies
Meats and Vegetables:
- 1 large onion
- 2 cloves garlic
Sauces, Dairy, and Seasonings:
- 1 (10.75 ounce) can condensed cream of mushroom soup
- 1 (10.75 ounce) can condensed cream of chicken soup
- 1 cup sour cream
- ½ cup milk
- 1 cup shredded cheddar cheese
- 2 tablespoons butter
- ¼ cup bread crumbs
- ½ teaspoon black pepper
- ¼ teaspoon garlic powder
- ¼ teaspoon onion powder
- 2 tablespoons chopped fresh parsley
- Salt to taste
Instructions
- Heat a large skillet to medium temperature. Slice 1 pound kielbasa into ¼-inch rounds and brown them until crispy for 5-7 minutes. Transfer the sausage to a separate plate, keeping the fat in the pan.
- Add 1 chopped onion to the skillet. Sauté for 5-7 minutes until translucent. Mince 2 garlic cloves and cook for 1 minute until fragrant. Return kielbasa to the skillet and mix together.
- Grab a large mixing bowl and whisk 1 can cream of mushroom soup, 1 can cream of chicken soup, 1 cup sour cream, and ½ cup milk until completely smooth. Stir in ½ teaspoon black pepper, ¼ teaspoon garlic powder, and ¼ teaspoon onion powder.
- Preheat your oven to 350F. Grease a 9×13 inch baking dish with butter or cooking spray. Layer half the frozen pierogies across the bottom of the dish.
- Spread half the kielbasa-onion mixture over the pierogies. Pour half the sauce evenly across the layer. Sprinkle ½ cup shredded cheddar cheese on top. Repeat these layers one more time.
- Melt 2 tablespoons butter in a small bowl. If using bread crumbs, mix ¼ cup bread crumbs into the melted butter. Drizzle this mixture across the casserole’s surface.
- Cover the dish with aluminum foil. Bake for 30 minutes at 350F. Remove foil and continue baking for 15-20 minutes until the cheese turns golden and the edges bubble.
- Remove the casserole from the oven. Let it rest for 10 minutes. Chop 2 tablespoons fresh parsley and sprinkle on top before serving hot.
Notes
- Choose potato and cheese pierogies for the most traditional flavor profile in this hearty casserole.
- Drain excess fat from kielbasa after browning to prevent the dish from becoming too greasy.
- Use full-fat sour cream and whole milk for a richer, creamier sauce that binds the casserole together.
- For a gluten-free version, replace bread crumbs with crushed gluten-free crackers and ensure all canned soups are certified gluten-free.
- Prep Time: 18-20 minutes
- Cook Time: 45-50 minutes
- Category: Casseroles
- Method: Baking
- Cuisine: Polish
Nutrition
- Serving Size: 6
- Calories: 457 kcal
- Sugar: 3 g
- Sodium: 1120 mg
- Fat: 32 g
- Saturated Fat: 14 g
- Unsaturated Fat: 16 g
- Trans Fat: 1 g
- Carbohydrates: 22 g
- Fiber: 2 g
- Protein: 18 g
- Cholesterol: 85 mg
Daniel Navarro
Culinary Content Director
Expertise
Mexican-inspired Menus, Seasonal Restaurant Specials, Shared Plate Dining, Tequila Pairings, Chef-driven Recipes
Education
Daniel writes about bold flavors, chef-driven dishes, and the kind of restaurant moments that turn tacos, mezcal, and shared plates into a night worth repeating.