
Recipe for Crispy Golden Chicken Baked to Perfection
Oven-fried chicken offers all the crispy, golden satisfaction of traditional fried chicken without the mess and fuss of deep frying.
It's comfort food that feels just a little bit lighter, making it perfect for busy weeknights when you want something special but don't have hours to spend in the kitchen.
The beauty lies in how it manages to achieve that coveted crunch and juicy interior through a simple baking method that actually works.
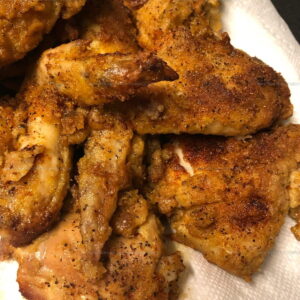
When you pull that pan from the oven and see the gorgeous brown coating, satisfaction hits immediately.
It pairs beautifully with classic sides and turns any ordinary dinner into something memorable.
Soon you will be counting down the minutes until that timer goes off and dinner is served.
Why Buttermilk Oven Fried Chicken Is Worth Trying
What Ingredients You’ll Need to Make Buttermilk Oven Fried Chicken
Chicken Base:Marinade:Coating Ingredients:Seasoning Blend:Cooking Support:Handy Kitchen Tools for Oven Fried Chicken
Cooking Method for Buttermilk Oven Fried Chicken
Marinate the Chicken
Grab your buttermilk and pour 1 cup into a large bowl. Nestle those 4 chicken breasts right into the creamy liquid. Pop the bowl in the refrigerator and let the chicken soak for 30 minutes to 2 hours – this helps make the meat super tender.
Prepare the Oven
Heat your oven to exactly 400°F. Line a baking sheet with parchment paper so nothing sticks.
Create Seasoned Flour
Time to mix up the crispy coating. Grab a shallow dish and combine the dry ingredients:
Stir everything together until it looks perfectly blended.
Prepare Egg Wash
In a separate shallow bowl, whisk 2 eggs until smooth and well combined.
Coat the Chicken
Pull the chicken from the buttermilk, letting any extra liquid drip away. Dunk each breast first into the egg mixture, then roll completely in the seasoned flour mixture. Make sure every inch gets a nice thick coating.
Prepare Baking Sheet
Drizzle 1/4 cup vegetable oil evenly across the parchment-lined baking sheet. Spread the coated chicken pieces on the sheet, keeping them from touching each other.
Bake the Chicken
Slide the baking sheet into the 400°F oven. Bake for 25-30 minutes, flipping the chicken halfway through cooking time to ensure even browning.
Check for Doneness
Use a meat thermometer to confirm the internal temperature hits 165°F. This ensures the chicken is completely safe to eat.
Rest and Serve
Take the chicken out of the oven and let it rest for 5 minutes. This helps the juices settle and keeps the meat nice and tender. Serve hot and enjoy your crispy oven-fried chicken!
A Few Helpful Notes For Buttermilk Oven-Fried Chicken
What Other Options Are There for Buttermilk Oven Fried Chicken
How To Serve Oven Fried Chicken
What’s The Best Way To Store Buttermilk Oven-Fried Chicken
Buttermilk Oven Fried Chicken Frequently Asked Questions
Can I use chicken thighs instead of breasts?
Absolutely! Chicken thighs work great in this recipe. Just adjust cooking time slightly since they might need a few extra minutes to reach the right temperature.
How long can chicken marinate in buttermilk?
The chicken can soak for up to 2 hours in the refrigerator. Longer marinating helps tenderize the meat and adds more flavor.
What makes the coating crispy without deep frying?
The combination of eggs and seasoned flour creates a crunchy exterior. Drizzling oil on the baking sheet helps the outside get golden and crisp.
Can this recipe be made gluten-free?
Replace regular flour with a gluten-free all-purpose flour blend. The seasoning mix will remain the same, so your chicken will taste just as delicious.
Are there alternatives to buttermilk?
If buttermilk isn’t available, mix regular milk with a tablespoon of lemon juice or vinegar. Let it sit for 5 minutes before using.
Oven-Fried Chicken Recipe
- Total Time: 1 hour – 1 hour 5 minutes
- Yield: 4 1x
Description
Crispy buttermilk oven-fried chicken delivers southern comfort right to your dinner table. Seasoned breading and tender meat make this classic dish a crowd-pleasing favorite your family will absolutely devour.
Ingredients
Main Protein:
- 4 chicken breasts
Coating Base:
- 2 cups all-purpose flour
- 2 eggs
- 1 cup buttermilk
Seasonings and Spices:
- 1 teaspoon salt
- 1 teaspoon black pepper
- 1 teaspoon paprika
- ½ teaspoon garlic powder
- ½ teaspoon onion powder
- ¼ teaspoon cayenne pepper
- ¼ cup vegetable oil
Instructions
- Submerge 4 chicken breasts in 1 cup buttermilk inside a large bowl. Refrigerate for 30 minutes to allow flavors to penetrate the meat.
- Heat your oven to precisely 400°F and prepare a baking sheet with parchment paper.
- Combine 2 cups flour with all dry seasonings (1 tsp salt, 1 tsp black pepper, 1 tsp paprika, ½ tsp garlic powder, ½ tsp onion powder, ¼ tsp cayenne) in a wide, shallow container.
- Crack 2 eggs into a separate shallow dish and whisk thoroughly.
- Drain chicken from buttermilk, allowing excess liquid to drip away completely.
- Dredge each chicken breast first through whisked eggs, then coat entirely in seasoned flour mixture.
- Spread ¼ cup vegetable oil evenly across prepared baking sheet.
- Arrange chicken pieces on oiled sheet, ensuring they are not touching each other.
- Slide baking sheet into 400°F oven and bake for 25-30 minutes, rotating chicken midway through cooking.
- Verify internal temperature reaches 165°F using a meat thermometer inserted into thickest part.
- Transfer chicken from oven and allow 5 minutes resting time before serving to retain juiciness.
Notes
- Marinating chicken in buttermilk helps tenderize the meat and infuse flavor deep into every bite.
- Pat chicken dry before coating to ensure the flour mixture sticks perfectly and creates a crisp exterior.
- For extra crunch, crush some breadcrumbs or cornflakes into the flour mixture before coating.
- Avoid overcrowding the baking sheet so each piece gets golden brown and crispy on all sides.
- Prep Time: 35 minutes
- Cook Time: 25-30 minutes
- Category: Oven-Fried
- Method: Baking
- Cuisine: American
Nutrition
- Serving Size: 4
- Calories: 555 kcal
- Sugar: 1 g
- Sodium: 670 mg
- Fat: 26 g
- Saturated Fat: 5 g
- Unsaturated Fat: 19 g
- Trans Fat: 0 g
- Carbohydrates: 40 g
- Fiber: 2 g
- Protein: 44 g
- Cholesterol: 145 mg
Daniel Navarro
Culinary Content Director
Expertise
Mexican-inspired Menus, Seasonal Restaurant Specials, Shared Plate Dining, Tequila Pairings, Chef-driven Recipes
Education
Daniel writes about bold flavors, chef-driven dishes, and the kind of restaurant moments that turn tacos, mezcal, and shared plates into a night worth repeating.