Crispy Baked Chicken Chimichangas Recipe for Dinner
Baked chicken chimichangas offer all the satisfaction of a classic Mexican favorite without the extra oil from frying.
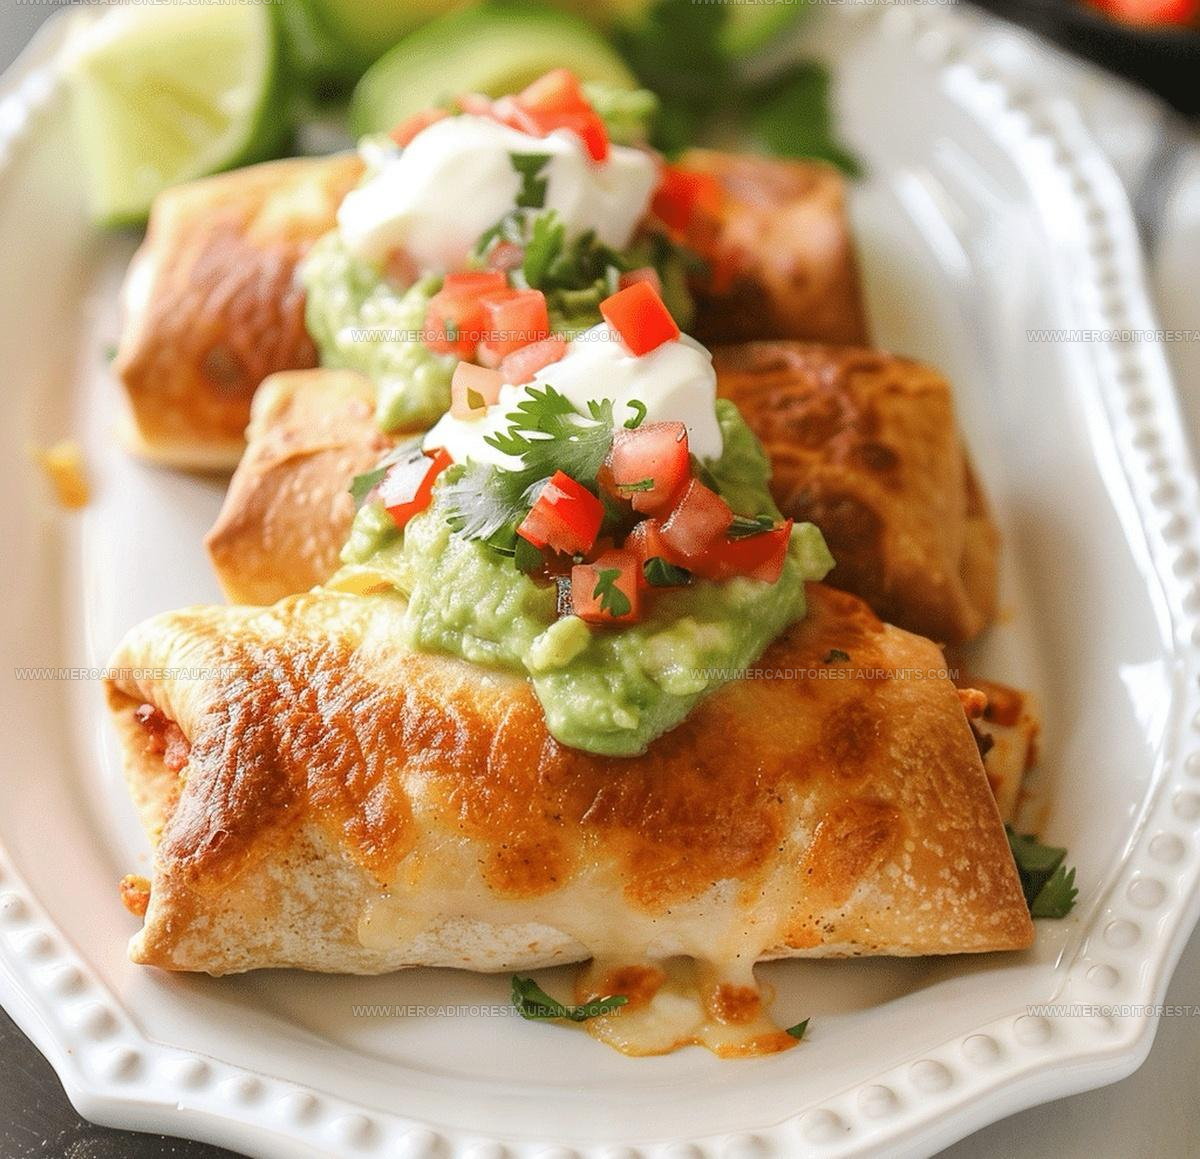
Golden, crispy tortillas wrap around a savory filling that becomes irresistibly delicious in the oven.
The combination of textures and flavors makes every bite exciting, from the crunchy exterior to the warm, satisfying center.
Serving them alongside rice, beans, or a fresh salad turns dinner into something memorable.
Kids love the fun handheld format, while adults appreciate the lighter preparation method.
Weeknight dinners just got a whole lot more exciting, and you can have them on the table faster than ordering takeout.
Standout Features Of Baked Chicken Chimichangas
Core Ingredients for Baked Chicken Chimichangas
Main Protein:Cheese and Creamy Components:Flavor Enhancers:Wrap and Finishing Components:Kitchen Tools Needed for Chicken Chimichangas
Preparing Baked Chicken Chimichangas Step by Step
Warm Up the Oven
Crank your oven to 400°F and grab a baking sheet. Line it with parchment paper so nothing sticks.
Cook the Chicken
Grab those 2 lbs of boneless skinless chicken breasts and boil them in water for 15-20 minutes. Make sure they’re completely cooked with zero pink showing.
Shred the Chicken
Transfer the cooked chicken to a large mixing bowl. Using two forks, tear the chicken into small shreds until it looks perfectly pulled apart.
Mix the Filling
Create your delicious filling by combining the shredded chicken with:
Stir everything together until it’s well mixed.
Prepare the Tortillas
Pop your 8 large flour tortillas in the microwave for 30 seconds. This makes them super soft and easier to fold.
Fill the Tortillas
Scoop about 1/2 cup of your chicken mixture right into the center of each tortilla.
Wrap the Chimichangas
Fold the sides of each tortilla inward, then roll tightly. Make sure you seal the edges so nothing leaks out during baking.
Prep for Baking
Brush each chimichanga with 1/4 cup olive oil, coating all sides generously.
Arrange on Baking Sheet
Place the chimichangas seam-side down on your prepared baking sheet. Give them a little space between each one.
Bake to Golden Perfection
Slide the baking sheet into the 400°F oven. Bake for 20-25 minutes, flipping them once halfway through. Watch for that beautiful golden brown color.
Cool and Serve
Pull the chimichangas out of the oven and let them rest for 5 minutes. Plate them up with 1 cup sour cream and 1/2 cup chopped fresh cilantro on the side.
Things Worth Knowing For Baked Chicken Chimichangas
Flavorful Options for Baked Chicken Chimichangas
Best Ways To Serve Baked Chicken Chimichangas
Proper Storage For Baked Chicken Chimichangas
Baked Chicken Chimichangas Frequently Asked Questions
Can I use rotisserie chicken instead of boiling chicken breasts?
Absolutely! Rotisserie chicken saves time and adds extra flavor. Simply shred the chicken and follow the rest of the recipe as written.
Are flour tortillas the best option for chimichangas?
Flour tortillas work perfectly because they’re soft, flexible, and hold the filling well. Corn tortillas might crack during rolling and baking.
How do I prevent my chimichangas from unrolling while baking?
Brush the edges with water before folding and rolling. This helps seal the tortilla and keeps the filling inside during baking.
Can these chimichangas be made ahead of time?
Prepare and assemble the chimichangas up to a day in advance. Store them covered in the refrigerator and bake when ready to serve.
What if my chimichangas aren’t getting crispy?
Brush extra olive oil on the exterior and make sure your oven is fully preheated. Place them on the center rack for even browning.
Is this recipe spicy?
The spice level depends on your salsa choice. Use mild salsa for less heat or add hot sauce for more kick.

Oven-Crispy Baked Chicken Chimichangas Recipe
- Total Time: 35-45 minutes
- Yield: 8 1x
Description
Mexican-style baked chicken chimichangas bring crispy, cheesy goodness right to your dinner table. Packed with seasoned chicken and wrapped in a golden tortilla, these baked beauties deliver maximum flavor without the deep-fry guilt.
Ingredients
Proteins:
- 2 lbs boneless skinless chicken breasts
Cheese and Dairy:
- 1 cup shredded cheddar cheese
- 1 (8 oz) package cream cheese
- 1 cup sour cream
Base and Spices:
- 8 large flour tortillas
- 1 cup salsa
- ¼ cup olive oil
- 1 teaspoon ground cumin
- 1 teaspoon chili powder
- ½ teaspoon garlic powder
- ¼ teaspoon salt
- ¼ teaspoon black pepper
- ½ cup chopped fresh cilantro
Instructions
- Heat your oven to 400°F and cover a baking sheet with parchment paper for easy cleanup.
- Fill a pot with water and boil 2 lbs chicken breasts for 15-20 minutes until no pink remains inside.
- Transfer cooked chicken to a large mixing bowl and shred thoroughly using two forks.
- Add 1 cup salsa, 8 oz cream cheese, 1 cup cheddar cheese, 1 tsp cumin, 1 tsp chili powder, ½ tsp garlic powder, ¼ tsp salt, and ¼ tsp pepper to the chicken. Mix until ingredients are evenly distributed.
- Microwave 8 large flour tortillas for 30 seconds to make them more pliable for folding.
- Scoop ½ cup chicken mixture into the center of each tortilla.
- Carefully fold the sides of the tortilla inward, then roll tightly to seal the filling completely.
- Brush each chimichanga with ¼ cup olive oil, ensuring complete surface coverage.
- Position chimichangas seam-side down on the prepared baking sheet, leaving space between them.
- Bake for 20-25 minutes, rotating the pan halfway through to ensure even browning.
- Remove from oven when chimichangas turn golden and crisp around the edges.
- Allow 5 minutes of cooling time before serving with 1 cup sour cream and ½ cup fresh chopped cilantro.
Notes
- Use chicken breasts at room temperature for more even cooking and faster shredding.
- Choose large flour tortillas that can hold plenty of filling without tearing during rolling.
- Drain excess liquid from salsa before mixing to prevent soggy chimichangas and ensure a crisp texture.
- For a lower-fat version, swap cream cheese for Greek yogurt and use lean chicken breast.
- Prep Time: 15-20 minutes
- Cook Time: 20-25 minutes
- Category: Baked
- Method: Baking
- Cuisine: Mexican-American
Nutrition
- Serving Size: 8
- Calories: 451 kcal
- Sugar: 2 g
- Sodium: 411 mg
- Fat: 30 g
- Saturated Fat: 11 g
- Unsaturated Fat: 17 g
- Trans Fat: 0.5 g
- Carbohydrates: 22 g
- Fiber: 2 g
- Protein: 32 g
- Cholesterol: 93 mg
Daniel Navarro
Culinary Content Director
Expertise
Mexican-inspired Menus, Seasonal Restaurant Specials, Shared Plate Dining, Tequila Pairings, Chef-driven Recipes
Education
Daniel writes about bold flavors, chef-driven dishes, and the kind of restaurant moments that turn tacos, mezcal, and shared plates into a night worth repeating.