Oven-Baked Ranch Chicken Recipe

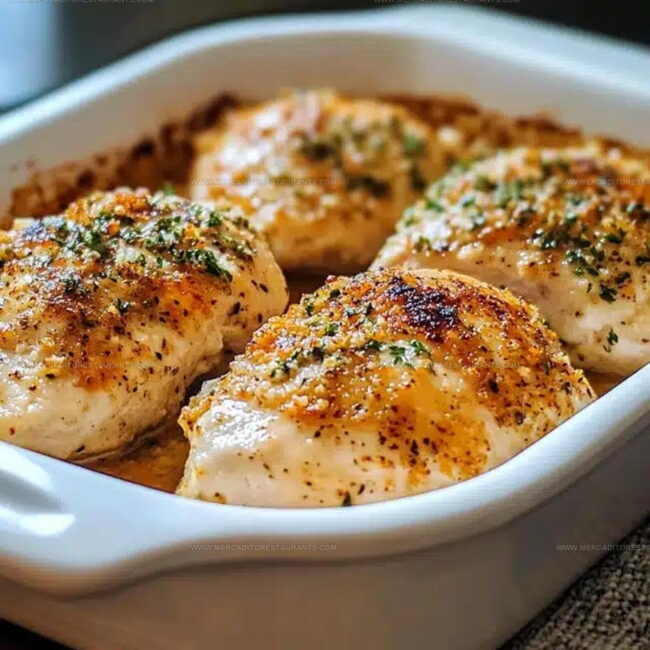
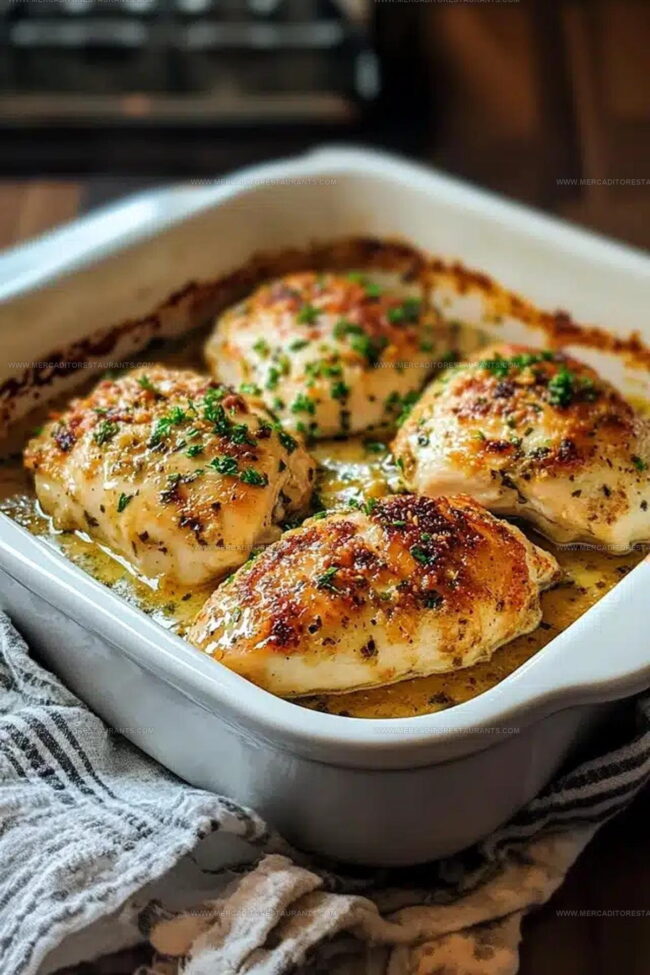
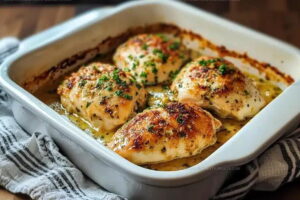
Ranch Chicken Recipe with Crunchy Baked Coating

Oven-baked ranch chicken recipe fans know this dinner delivers bold flavor with minimal effort on busy weeknights.

The savory coating turns golden and crispy while the meat stays tender and juicy inside.

Everyone at the table will ask for seconds when you serve this crowd-pleasing main course.

Simple preparation means less time in the kitchen and more moments enjoying a satisfying meal together.

Comfort food doesn't need to be complicated, and this dish proves that point perfectly.

Weeknight stress disappears when dinner comes together so easily yet tastes so delicious.

Scroll down now to see how simple creating this family favorite can be.

Reasons To Fall For The Simple Magic Of Baked Ranch Chicken

  • Simple Prep: Coating chicken becomes a breeze with just two bowls and basic ingredients. Your kitchen skills feel like a pro chef without complicated techniques.
  • Family-Friendly Flavor: Ranch seasoning makes this dish a total crowd-pleaser for picky eaters. Children and adults will gobble up every crispy, tasty bite.
  • Hands-Off Cooking: The oven does most of the work while you relax or handle other tasks. Your dinner comes together with minimal effort and maximum deliciousness.
  • Versatile Meal Solution: This chicken pairs perfectly with countless side dishes for quick weeknight dinners. Your meal planning just got super flexible and stress-free.

What Makes This Baked Ranch Chicken An Effortless Weeknight Hero

What Makes This Baked Ranch Chicken An Effortless Weeknight Hero
Main Protein:
  • 4 Boneless, Skinless Chicken Breasts: Lean and tender pieces perfect for creating a crispy, flavorful main course. Selecting fresh chicken ensures the best taste and texture for your meal.
Coating Ingredients:
  • 1 Cup Breadcrumbs: Crunchy base that transforms your chicken with a golden exterior. Provides essential texture and helps seal in moisture.
  • ½ Cup Grated Parmesan Cheese, 1 Packet Ranch Seasoning Mix: Cheesy, tangy flavor boosters that elevate the ordinary chicken coating. These ingredients create a rich, savory profile that makes the dish memorable.
Seasoning Blend:
  • 1 Teaspoon Garlic Powder, 1 Teaspoon Onion Powder, ½ Teaspoon Paprika: Aromatic spices that bring depth and warmth to your chicken’s coating. Each spice contributes a unique note to the overall flavor experience.
Binding Ingredients:
  • 1 Egg, 2 Tablespoons Milk: Creamy mixture that helps breadcrumbs cling perfectly to your chicken. Creates a smooth, even coating for maximum crispiness.
Finishing Touch:
  • 2 Tablespoons Olive Oil: Helps achieve a beautiful golden-brown crust and adds a subtle richness to the chicken’s exterior.

What Goes Into Making This Baked Ranch Chicken

  • Baking Sheet (18×13-inch): Your trusty pan will hold the chicken and catch any drips while creating that perfect crispy coating. Grab a high-quality sheet that conducts heat evenly.
  • Shallow Bowls (2): These will be your mixing stations for the egg wash and breadcrumb mixture. Ceramic or glass work best for easy coating.
  • Whisk: Essential for blending the egg and milk smoothly without leaving any lumps behind. A standard 10-inch kitchen whisk does the trick perfectly.
  • Measuring Cups and Spoons: Precision matters when adding seasoning, so use standard measuring tools to get the ratios just right.
  • Paper Towels: These help pat the chicken dry, ensuring your coating sticks like a charm and creates that golden crunch.
  • Meat Thermometer: Your reliable tool for checking that chicken reaches the safe internal temperature of 165°F without guesswork.
  • Cutting Board: A sturdy surface for prepping chicken and keeping your kitchen clean during the coating process.
  • Sharp Kitchen Knife: Helpful for trimming any excess fat or uneven edges from the chicken breasts before cooking.

Steps That Protect Ranch Chicken From Drying Out

Steps That Protect Ranch Chicken From Drying Out
1

Prepare the Oven

Heat the oven to 400°F (200°C). Grab a baking sheet and line it with parchment paper or give it a quick spray of olive oil so your chicken doesn’t stick.

2

Create the Egg Wash

Grab a shallow bowl and whisk together 1 egg and 2 tablespoons milk. This mixture helps the coating cling to your chicken and creates that perfect crispy exterior you’re after.

3

Mix the Coating

In another bowl, combine your dry ingredients:

  • 1 cup breadcrumbs
  • ½ cup grated Parmesan cheese
  • 1 packet ranch seasoning mix
  • 1 teaspoon garlic powder
  • 1 teaspoon onion powder
  • ½ teaspoon paprika

Stir everything together so the flavors are evenly distributed.

4

Prepare the Chicken

Grab your 4 chicken breasts and pat them completely dry with a paper towel. This helps the coating stick like a champ.

5

Coat the Chicken

Dunk each chicken breast into the egg mixture, making sure it’s completely covered. Then roll it in the seasoned breadcrumb mixture, pressing firmly to get a nice, even coating on all sides.

6

Prepare for Baking

Transfer the coated chicken to your prepared baking sheet. Drizzle 2 tablespoons of olive oil over the top of the chicken to help it turn a beautiful golden brown.

7

Bake to Perfection

Slide the baking sheet into the preheated oven. Bake for 25-30 minutes until the chicken reaches an internal temperature of 165°F (75°C). The coating should look crispy and golden brown.

8

Rest and Serve

Let the chicken rest for a few minutes after pulling it out of the oven. This keeps the meat super juicy. Serve alongside roasted vegetables, rice, or a fresh green salad for a complete meal.

Little Enhancers For Bigger Ranch Flavor

Little Enhancers For Bigger Ranch Flavor
  • Whisk your egg and milk together thoroughly to create a perfect sticky base that helps the breadcrumb coating cling beautifully to your chicken.
  • Mix your breadcrumb coating ingredients super well so every bite gets maximum ranch and cheese flavor distributed evenly across the chicken.
  • Press the breadcrumb mixture firmly onto your chicken, using gentle pressure to ensure a thick, crispy layer that won’t fall off during baking.
  • Pat your chicken breasts completely dry before dipping into the egg mixture, which helps the coating stick better and creates a crunchier exterior.
  • Drizzle a little olive oil over the top of your breaded chicken to help it turn that perfect golden color and achieve an extra-crispy texture.

Ranch Chicken Variations Worth Trying

Ranch Chicken Variations Worth Trying
  • Gluten-Free Ranch Chicken: Swap regular breadcrumbs with crushed gluten-free crackers or almond flour for a celiac-friendly version that keeps your coating crispy and flavorful.
  • Low-Carb Ranch Chicken: Replace breadcrumbs with crushed pork rinds or crushed keto-friendly chips to cut down carbohydrates while maintaining a crunchy exterior.
  • Spicy Ranch Chicken: Add red pepper flakes or cayenne pepper to the breadcrumb mixture if your taste buds crave an extra kick of heat in your chicken coating.
  • Air Fryer Ranch Chicken: Cook the coated chicken in an air fryer at 375°F for 12-15 minutes, which delivers a faster cooking method with equally crisp results.

Service Style For A Savory And Juicy Baked Ranch Chicken

  • Serve with Fresh Sides: Pair this ranch chicken with roasted broccoli or a crisp garden salad to balance the savory coating and add some bright, fresh flavors to your plate.
  • Slice and Share: After resting, slice the chicken diagonally to show off that gorgeous golden crust, which makes the dish look even more appetizing when serving.
  • Perfect Dipping Companions: Prepare some quick ranch or honey mustard dipping sauce on the side – your guests will love having extra flavor to complement the already delicious chicken.
  • Temperature Check: Use a meat thermometer to confirm the chicken reaches 165°F, ensuring it’s perfectly cooked and safe to enjoy without overcooking and drying out the meat.

Ranch Chicken Storage That Stays Juicy

Ranch Chicken Storage That Stays Juicy
  • Refrigerate leftover chicken in an airtight container for up to 3-4 days, making sure the pieces don’t touch each other to keep the crispy coating intact.
  • Reheat your chicken in the oven at 350°F for 10-15 minutes, which helps restore the original crispiness better than a microwave would.
  • Slice cold chicken and add it to salads for a protein boost, keeping the ranch-seasoned coating as a delicious flavor enhancer.
  • Freeze individual portions wrapped tightly in plastic wrap and aluminum foil for quick future meals, perfect for busy weeknights when cooking time is short.

Ranch Chicken FAQs People Ask Often

FAQ

What makes ranch seasoning so special in this recipe?

Ranch seasoning adds a tangy, herby flavor that transforms ordinary chicken into a delicious meal. The blend of dried herbs and spices creates a zesty coating that makes your chicken taste amazing.

FAQ

Can I use chicken thighs instead of chicken breasts?

Absolutely! Chicken thighs work perfectly with this recipe. Just adjust the cooking time slightly since thighs might take a few minutes longer to cook through.

FAQ

Is there a gluten-free option for the breadcrumbs?

Yes! Replace regular breadcrumbs with gluten-free breadcrumbs or crushed gluten-free crackers. Almond flour also makes an excellent coating alternative.

FAQ

How do I know the chicken is completely cooked?

Always use a meat thermometer to check that the internal temperature reaches 165°F. This ensures your chicken is safe to eat and remains juicy.

FAQ

Can I prepare the chicken ahead of time?

Definitely! You can coat the chicken and refrigerate it for up to 4 hours before baking. Just remember to bring it to room temperature before cooking for even heating.

Print
clock clock iconcutlery cutlery iconflag flag iconfolder folder iconinstagram instagram iconpinterest pinterest iconfacebook facebook iconprint print iconsquares squares iconheart heart iconheart solid heart solid icon
Oven-Baked Ranch Chicken Recipe

Oven-Baked Ranch Chicken Recipe


5 Stars 4 Stars 3 Stars 2 Stars 1 Star

4.6 from 24 reviews

  • Total Time: 40-45 minutes
  • Yield: 4 1x

Description

Baked Ranch Chicken delivers a simple weeknight dinner solution that brings serious flavor to your table. Tender chicken breasts coated in a zesty ranch seasoning blend come together quickly and satisfy hungry family members with minimal kitchen effort.


Ingredients

Scale

Main Ingredients:

  • 4 boneless, skinless chicken breasts

Breading:

  • 1 cup breadcrumbs
  • ½ cup grated Parmesan cheese
  • 1 packet ranch seasoning mix

Seasonings and Liquids:

  • 1 teaspoon garlic powder
  • 1 teaspoon onion powder
  • ½ teaspoon paprika
  • 1 egg
  • 2 tablespoons milk
  • 2 tablespoons olive oil

Instructions

  1. Preheat the oven to 400°F (200°C). Prepare a baking sheet with parchment paper or a light coat of olive oil to prevent sticking.
  2. Whisk 1 egg and 2 tablespoons milk in a shallow bowl, creating a binding liquid for the coating.
  3. Mix 1 cup breadcrumbs, ½ cup Parmesan cheese, 1 packet ranch seasoning, 1 teaspoon garlic powder, 1 teaspoon onion powder, and ½ teaspoon paprika in another bowl.
  4. Thoroughly dry 4 chicken breasts with paper towels to help the coating adhere perfectly.
  5. Submerge each chicken breast into the egg mixture, ensuring complete coverage.
  6. Press the coated chicken into the breadcrumb blend, carefully covering every surface and gently patting the mixture to secure it.
  7. Arrange the coated chicken on the prepared baking sheet and drizzle 2 tablespoons olive oil over the top for a golden crispness.
  8. Roast for 25-30 minutes until the chicken reaches an internal temperature of 165°F (75°C), with a crispy, golden-brown exterior.
  9. Allow the chicken to rest 3-4 minutes before serving, which helps retain moisture and makes for a more tender bite.

Notes

  • Swap chicken breasts for thighs if preferring more tender meat with richer flavor.
  • Pat chicken completely dry before coating to help seasoning adhere better and create crispier exterior.
  • For gluten-free version, replace regular breadcrumbs with crushed gluten-free crackers or almond flour.
  • Letting chicken rest 5 minutes after baking helps redistribute juices, keeping the meat more tender and moist.
  • Prep Time: 15 minutes
  • Cook Time: 25-30 minutes
  • Category: Baked
  • Method: Baking
  • Cuisine: American

Nutrition

  • Serving Size: 4
  • Calories: 370 kcal
  • Sugar: 1 g
  • Sodium: 650 mg
  • Fat: 18 g
  • Saturated Fat: 4 g
  • Unsaturated Fat: 14 g
  • Trans Fat: 0 g
  • Carbohydrates: 15 g
  • Fiber: 1 g
  • Protein: 38 g
  • Cholesterol: 120 mg
Isabella Romero

Isabella Romero

Hospitality & Beverage Editor

Expertise

Cocktail Culture, Tequila and Mezcal Knowledge, Guest Experience Writing, Restaurant Trends, Event Dining Guides

Education

National Louis University, Kendall College
  • Program: B.A. in Hospitality Management
  • Focus: Studied hospitality through a program built around theory and application, with practical preparation for restaurant and guest-experience careers in Chicago’s hospitality industry.
Wine & Spirit Education Trust (WSET)
  • Program: Level 2 Award in Spirits
  • Focus: Studied core spirits categories, tasting methodology, service principles, and the use of spirits in cocktails, making it a strong fit for beverage content tied to tequila, mezcal, and cocktail culture.

Isabella brings together cocktails, food culture, social dining, and the thoughtful details that make a meal feel memorable. Her content blends atmosphere, flavor, and hospitality in a warm, polished style that helps readers connect with the full dining experience, from the first sip to the last bite.

Leave a Reply

Your email address will not be published. Required fields are marked *

Recipe rating 5 Stars 4 Stars 3 Stars 2 Stars 1 Star