
Melty Baked Cheese Bombs Recipe That Disappears in Minutes
Melty baked cheese bombs are exactly what comfort food dreams are made of – golden pockets packed with oozy goodness that satisfy every craving.
These little bundles deliver maximum flavor in just a few bites, making them perfect for gatherings, game nights, or anytime you want something truly indulgent.
They work wonderfully as appetizers, snacks, or even a fun dinner option when you need something different.
The combination of textures and flavors creates an experience that appeals to all ages and tastes.
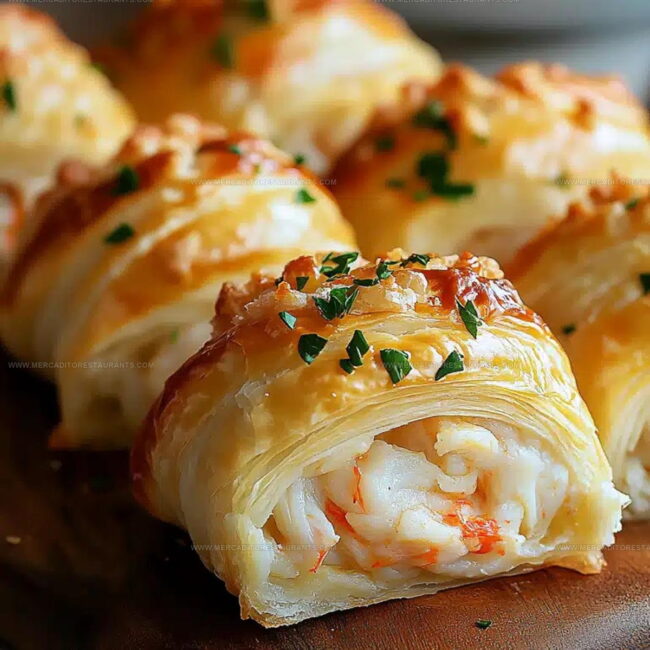
Every mouthful offers that perfect contrast between a crisp exterior and a warm, gooey center that makes them absolutely addictive.
Start making a batch now and watch how quickly they become a household favorite.
The Dramatic, Pull-Apart Gooey Bliss of Fresh Baked Cheese Bombs
Cheese Dough And Seasoning Basics For Baked Cheese Bombs
Baking Trays And Dough Handling Tools For Baked Cheese Bombs
Method for Creating Leak-Proof Baked Cheese Bombs

Prepare the Oven
Preheat the oven to 375°F (190°C). Grab a baking sheet and line it with parchment paper or spray it with nonstick cooking spray. This ensures your cheese bombs won’t stick and will come out perfectly.
Shape the Dough
Open the can of refrigerated biscuit dough and separate each piece. Gently flatten each dough piece into a 3-inch round disc using your fingers or the palm of your hand. Work carefully to keep the dough even.
Fill the Cheese Bombs
For each dough disc, add your cheese filling:
Place the filling right in the center of each disc, leaving a bit of space around the edges.
Seal the Bombs
Carefully fold the edges of the dough over the filling, pinching and sealing tightly to prevent any cheese from leaking. Flip each bomb seam-side down on the prepared baking sheet.
Prepare the Butter Topping
In a small bowl, mix together:
Brush this mixture generously over the top of each dough ball.
Bake the Cheese Bombs
Place the baking sheet in the preheated oven and bake for 12-15 minutes. Watch for a golden brown color and puffy appearance, which signals they’re perfectly done.
Finish and Serve
Remove the cheese bombs from the oven. If desired, brush with a little extra melted butter. Sprinkle 1 tablespoon of chopped parsley over the top for a fresh finish. Serve warm and enjoy immediately while the cheese is still melty and delicious.
Sealing Maneuvers To Prevent Leaks In Melty Baked Cheese Bombs

Gooey Appetizer Flips For Melty Cheese Bombs
Gooey Appetizer Dipping Duos For Cheese Bombs
Melty Dough Preservation Protocols For Cheese Bombs
Baked Cheese Bombs Q&A for the Best Melty Centers
Can I use different types of cheese?
Absolutely! Cheddar, mozzarella, or pepper jack work perfectly. Choose a cheese that melts well and matches your flavor preferences.
How do I prevent the cheese from leaking?
Seal the edges tightly and pinch the dough completely closed. Ensure no cheese touches the baking sheet’s surface.
Are refrigerated biscuits the only dough option?
Not at all. Crescent roll dough, pizza dough, or homemade biscuit dough can create delicious cheese bombs.
Can these be made ahead of time?
Prepare the bombs and refrigerate them unbaked for several hours. When ready, brush with butter and bake directly from the refrigerator.
What herbs work best with these cheese bombs?
Dried or fresh parsley, basil, oregano, or chives complement the cheese beautifully. Experiment with your favorite herb blend.
Is there a way to make them spicier?
Add red pepper flakes to the butter, mix in diced jalapeños with the cheese, or sprinkle cayenne powder for extra kick.

Melty Baked Cheese Bombs Recipe
- Total Time: 22-25 minutes
- Yield: 8 1x
Description
Bacon Stuffed Cheese Bombs explode with cheesy goodness that makes weekend brunch feel totally special. Crispy bacon and melted cheese tucked inside warm, golden pastry create a simple snack perfect for grabbing and devouring with friends.
Ingredients
Main Ingredients:
- 1 can (8 count) refrigerated biscuit dough or pizza dough
- 1 cup shredded or cubed mozzarella cheese
Supporting Ingredients:
- ½ cup cooked seasoned ground beef or sauteed mushrooms
Seasonings and Garnish:
- 1 tablespoon melted butter
- ½ teaspoon garlic powder
- ½ teaspoon dried Italian herbs
- 1 tablespoon chopped parsley
Instructions
- Preheat your oven to 375°F (190°C) and prepare a baking sheet with parchment paper or nonstick spray.
- Take each biscuit and gently stretch it into a 3-inch round disc using your fingertips.
- Position 2 tablespoons of mozzarella cheese (about 1 ounce) directly in the center of each disc.
- If using, add 1 tablespoon of ground beef or mushrooms on top of the cheese.
- Carefully gather the edges of the dough, pinching and folding to completely enclose the filling without leaving gaps.
- Place each sealed dough ball seam-side down, ensuring they do not touch on the baking sheet.
- Melt 1 tablespoon of butter and stir in ½ teaspoon garlic powder and ½ teaspoon Italian herbs.
- Brush the herbed butter generously over the surface of each dough ball.
- Slide the baking sheet into the preheated oven and bake for 12-15 minutes until the exterior turns deep golden brown.
- Remove from the oven and let rest for 2-3 minutes to allow cheese to settle.
- Optional: Brush with additional melted butter and sprinkle chopped parsley on top before serving.
Notes
- Check biscuit dough freshness to ensure a light, fluffy texture that puffs perfectly when baking.
- Seal edges completely to prevent cheese from leaking during the baking process, creating messy cheese blowouts.
- Experiment with different cheese types like mozzarella, cheddar, or pepper jack for varied flavor profiles and melting characteristics.
- Room temperature ingredients help dough stretch more easily and create a smoother, more even seal around the cheese filling.
- Prep Time: 10 minutes
- Cook Time: 12-15 minutes
- Category: Baked
- Method: Baking
- Cuisine: American
Nutrition
- Serving Size: 8
- Calories: 220 kcal
- Sugar: 1 g
- Sodium: 400 mg
- Fat: 14 g
- Saturated Fat: 7 g
- Unsaturated Fat: 6 g
- Trans Fat: 0.5 g
- Carbohydrates: 15 g
- Fiber: 1 g
- Protein: 11 g
- Cholesterol: 35 mg
Isabella Romero
Hospitality & Beverage Editor
Expertise
Cocktail Culture, Tequila and Mezcal Knowledge, Guest Experience Writing, Restaurant Trends, Event Dining Guides
Education
- Program: B.A. in Hospitality Management
- Focus: Studied hospitality through a program built around theory and application, with practical preparation for restaurant and guest-experience careers in Chicago’s hospitality industry.
Wine & Spirit Education Trust (WSET)Isabella brings together cocktails, food culture, social dining, and the thoughtful details that make a meal feel memorable. Her content blends atmosphere, flavor, and hospitality in a warm, polished style that helps readers connect with the full dining experience, from the first sip to the last bite.