
Crispy Baked Broccoli Cheese Balls Recipe for Snacks
Baked broccoli cheese balls deliver everything you want in a snack that feels good to eat and even better to share.
They combine comfort and nutrition in bite-sized portions that disappear faster than you can make them.
Perfect for parties, game days, or simple weeknight meals, they satisfy cravings without weighing anyone down.
The crispy golden exterior gives way to a tender, flavorful center that appeals to picky eaters and adventurous palates.
You can serve them as appetizers, side dishes, or fun finger food that actually fills people up.
They also reheat beautifully, making leftovers something to look forward to instead of tolerate.
Every bite offers that satisfying crunch followed by melty, savory goodness that keeps hands reaching for more.
Consider adding them to your rotation for an option that offers both flavor and function every single time.
Best Reasons To Try Baked Broccoli Cheese Balls
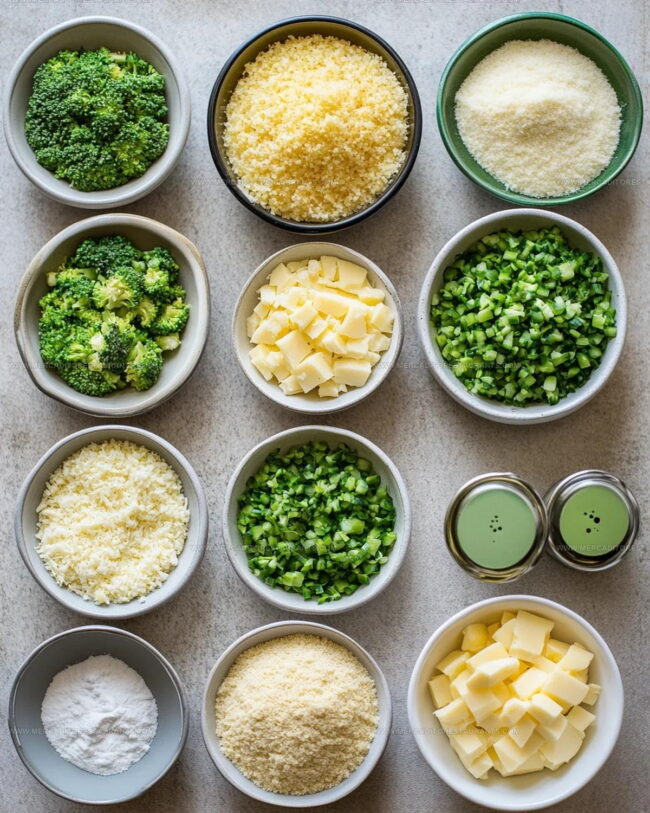
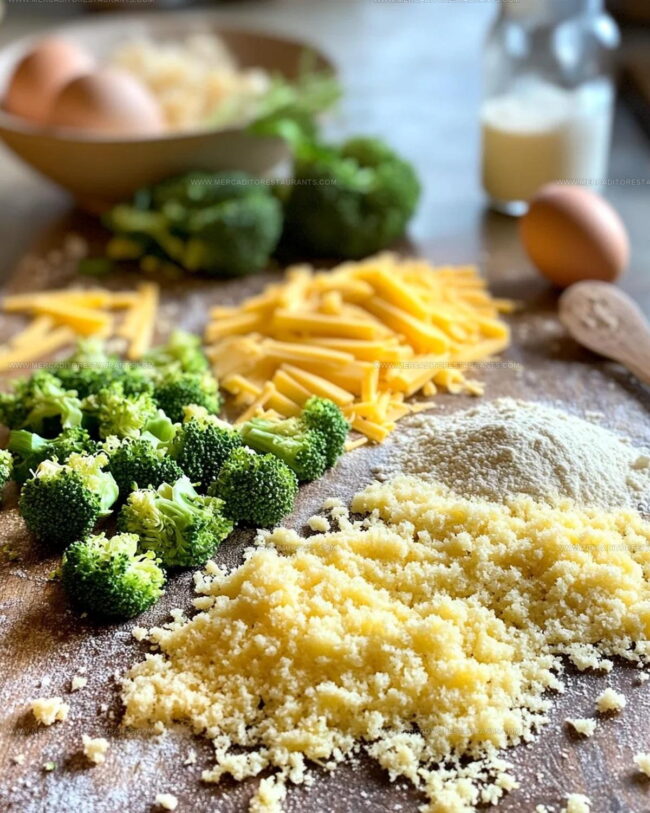
All Ingredients Needed for Baked Broccoli Cheese Balls
What Tools Are Needed for Broccoli Cheese Balls
Easy Instructions For Broccoli Cheese Balls
Prep the Oven
Crank up your oven to a toasty 400°F. This hot temperature will help your broccoli cheese balls get that perfect golden exterior.
Steam the Broccoli
Grab your steamer and cook those broccoli florets for 3-5 minutes until they’re tender but still have a nice little crunch. Let them cool down a bit after steaming.
Mix the Ingredients
Time to create some magic in a big mixing bowl! Toss in your ingredients carefully:
Blend everything together until it feels like a cohesive mixture that will hold its shape.
Form the Balls
Roll the mixture into small 1-inch balls. Your hands might get a bit messy, but that’s part of the fun! Place each ball on a baking sheet sprayed with cooking spray.
Bake to Golden Perfection
Slide the baking sheet into the preheated oven. Bake for 20-25 minutes until the balls turn a beautiful golden brown. For extra crispy edges, switch to broil for 1-2 minutes at the end.
Cool and Serve
Let the broccoli cheese balls rest for a few minutes after baking. They’ll be super hot, so give them a moment to cool down before serving.
Ideal Tips For Broccoli Cheese Balls

Which Variations Work for Broccoli Cheese Balls
Serving Options for Baked Broccoli Cheese Balls
Ideal Baked Broccoli Cheese Balls Storage Guide
Baked Broccoli Cheese Balls FAQs
Can I make these broccoli cheese balls ahead of time?
Absolutely! Prepare the balls and refrigerate them uncooked for up to 24 hours before baking. Just cover the baking sheet with plastic wrap to keep them fresh.
Are these broccoli cheese balls freezer-friendly?
Yes, you can freeze the uncooked balls on a baking sheet, then transfer to a freezer bag. When ready to eat, bake directly from frozen, adding a few extra minutes to cooking time.
Can I use frozen broccoli instead of fresh?
Definitely! Thaw the frozen broccoli completely, drain excess water, and pat dry before mixing with other ingredients to prevent soggy balls.
What can I do if the mixture seems too wet?
Add a bit more breadcrumbs to help bind the ingredients and make shaping easier. The mixture should hold together when gently pressed.
Are these broccoli cheese balls gluten-free?
Not as written. To make them gluten-free, swap regular breadcrumbs for gluten-free breadcrumbs and use a gluten-free flour blend.

Ideal Baked Broccoli Cheese Balls Recipe
- Total Time: 33-42 minutes
- Yield: 4 1x
Description
Baked Broccoli Cheese Balls turn your veggie side into a crispy, golden snack that friends and family will devour in minutes. Packed with cheesy goodness and sneaky nutrition, these bite-sized treats make veggies feel like a total celebration.
Ingredients
Main Ingredients:
- 2 cups broccoli florets
- 1 ½ cups shredded cheddar cheese
- 2 eggs
Binding Ingredients:
- 1 cup breadcrumbs
- 2 tablespoons all-purpose flour
- ⅓ cup grated Parmesan cheese
Seasoning Ingredients:
- ½ teaspoon garlic powder
- ½ teaspoon onion powder
- Salt
- Pepper
Preparation Ingredient:
- Cooking spray
Instructions
- Set your oven to 400°F and spray a baking sheet with cooking spray to prevent sticking.
- Steam 2 cups of broccoli florets for exactly 3-5 minutes until they reach a tender-crisp texture.
- Drain the broccoli and let it cool for 2 minutes to remove excess moisture.
- Combine 2 cups broccoli, 1 cup breadcrumbs, 1 ½ cups cheddar cheese, ⅓ cup Parmesan, 2 eggs, and 2 tbsp flour in a mixing bowl.
- Add ½ tsp garlic powder, ½ tsp onion powder, salt, and pepper to your mixture.
- Mix all ingredients thoroughly until your mixture holds together when pressed.
- Roll the mixture into 1-inch compact balls using your palms, ensuring they are tightly packed.
- Arrange the balls on your prepared baking sheet, spacing them 1 inch apart.
- Bake at 400°F for 20-25 minutes, watching for a golden brown exterior.
- Optional: Broil for an additional 1-2 minutes to create a crispy, slightly charred surface.
- Remove from oven and let the broccoli cheese balls rest for 3 minutes before serving.
Notes
- Steam the broccoli just until tender to keep a bright green color and prevent mushiness in your cheese balls.
- Grate the cheese fresh for the best melting quality and more intense flavor in the mixture.
- Ensure the broccoli is well-drained after steaming to prevent excess moisture from making the balls fall apart.
- When shaping the balls, press the mixture firmly and compactly to help them hold together during baking.
- Prep Time: 10-15 minutes
- Cook Time: 23-27 minutes
- Category: Baked
- Method: Baking
- Cuisine: American
Nutrition
- Serving Size: 4
- Calories: 260 kcal
- Sugar: 2 g
- Sodium: 400 mg
- Fat: 18 g
- Saturated Fat: 9 g
- Unsaturated Fat: 7 g
- Trans Fat: 0.5 g
- Carbohydrates: 12 g
- Fiber: 2 g
- Protein: 14 g
- Cholesterol: 85 mg
Daniel Navarro
Culinary Content Director
Expertise
Mexican-inspired Menus, Seasonal Restaurant Specials, Shared Plate Dining, Tequila Pairings, Chef-driven Recipes
Education
Daniel writes about bold flavors, chef-driven dishes, and the kind of restaurant moments that turn tacos, mezcal, and shared plates into a night worth repeating.