Crispy Baked Chapter Tenders Recipe Kids Adore
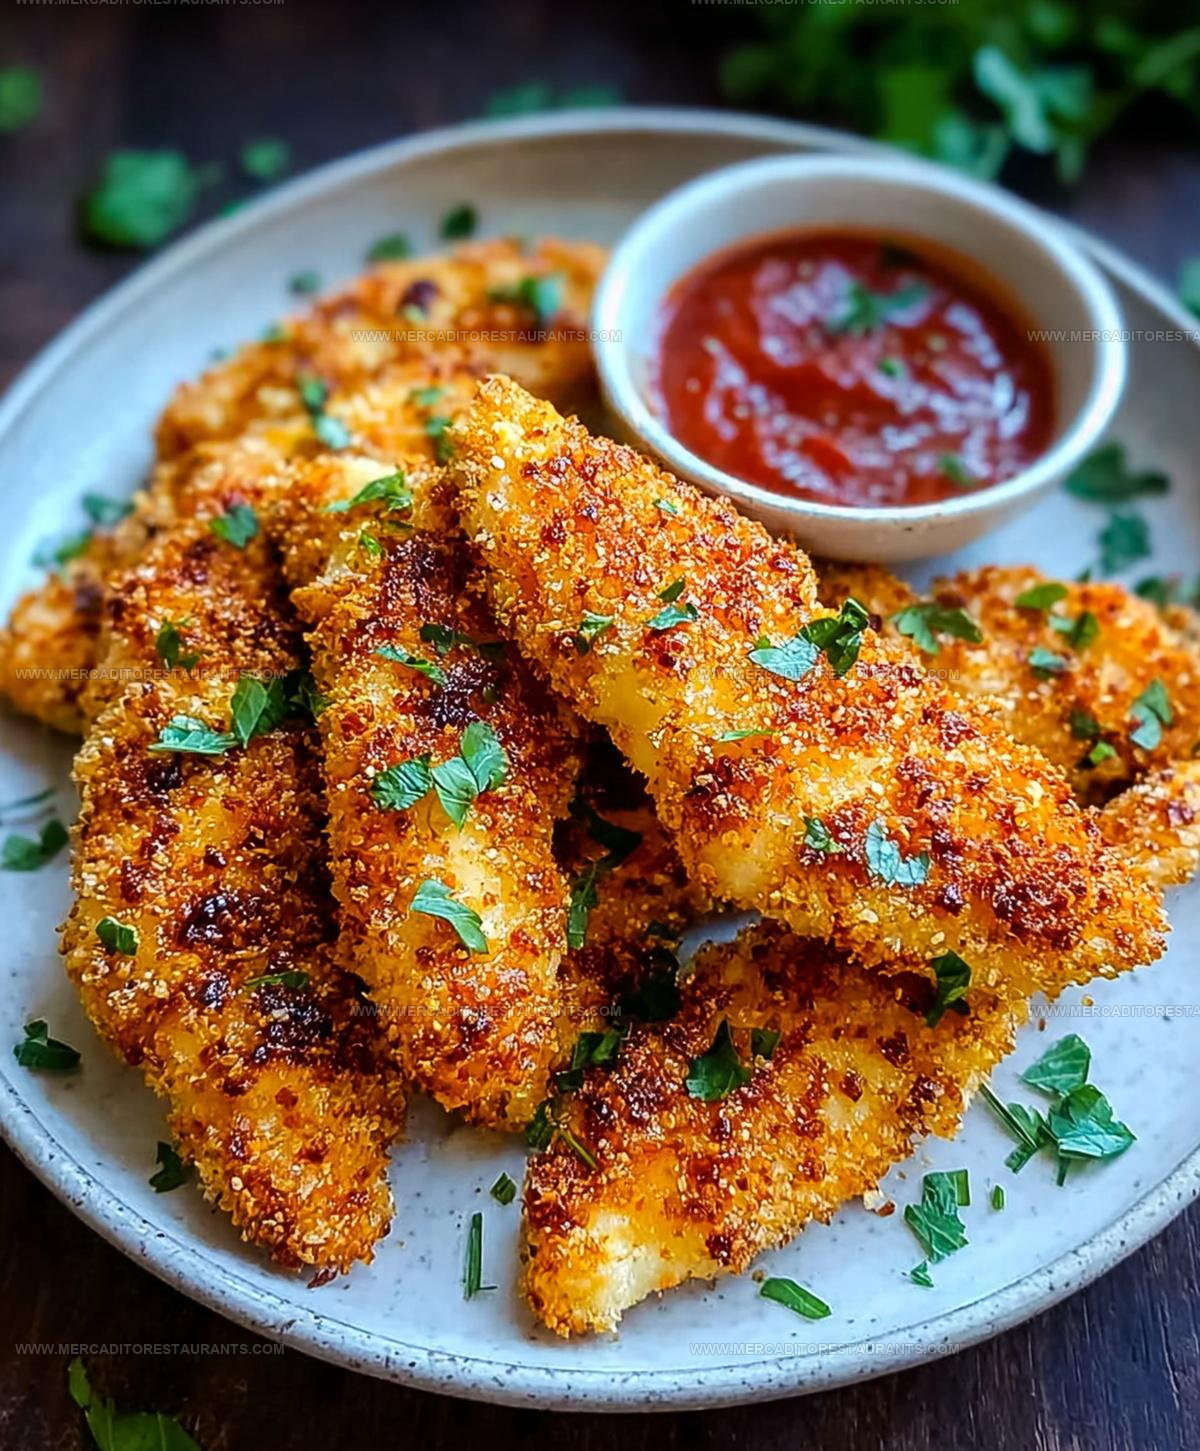
Crispy baked chicken tenders are a family favorite that satisfies cravings without all the guilt of deep frying.
They come out golden and crunchy on the outside while staying juicy inside, making them absolutely perfect for weeknight dinners or game day snacks.
The oven does most of the work, so you can focus on side dishes or just relax while they bake to perfection.
They're versatile enough for lunch boxes, party platters, or casual meals when you want something everyone will happily devour.
No special skills are required to nail the texture that rivals any takeout version.
Time to preheat that oven and make dinnertime something everyone looks forward to tonight.
Why You’ll Love Crispy Oven-Baked Chicken Tenders
Ingredients at a Glance for Crispy Baked Chicken Tenders
Main Protein:Binding Ingredients:Coating Ingredients:Seasoning Ingredients:Finishing Ingredient:Optional Add-Ins:Tool Overview for Crispy Baked Chicken Tenders
Crispy Baked Chicken Tenders Cooking Instructions
Prepare the Chicken
Grab that pound of chicken and slice it into neat 1-inch strips if needed. Take a paper towel and pat those strips super dry – this trick helps the breading stick like a champ. Getting the moisture off means extra crispy results.
Create Breading Station
Set up two bowls on your counter. In the first bowl, crack and whisk those 2 large eggs until they’re smooth. In the second bowl, mix together the dry ingredients:
Stir everything until it’s well combined.
Season the Chicken
Sprinkle a pinch of salt and pepper directly onto your chicken strips. This adds flavor right into the meat.
Coat the Chicken
Dunk each chicken strip into the egg, letting any extra drip off. Then roll it in the breadcrumb mixture, pressing gently so the coating sticks nicely. For super crunch, repeat the egg and breadcrumb dip.
Prepare Baking Sheet
Grab a baking sheet and line it with parchment paper. If you have a wire rack, place it on top for maximum crispiness. Arrange the breaded chicken strips with a bit of space between them.
Ready to Bake
Spritz the chicken lightly with olive oil spray. This helps create that golden exterior we all love.
Bake the Tenders
Preheat your oven to 400°F. Slide the baking sheet into the oven and bake for 20-25 minutes. Flip the tenders halfway through cooking to ensure even browning. They’re done when the coating looks golden and the internal temperature hits 165°F.
Rest and Serve
Let the tenders rest for a few minutes – this helps keep the coating super crisp. Serve with ranch, honey mustard, or your favorite dipping sauce.
How to Enhance Crispy Baked Chicken Tenders
Crispy Baked Chicken Tenders with Coating Options
Best Ways to Enjoy Baked Chicken Tenders
Proper Storage For Crispy Baked Chicken Tenders
Crispy Baked Chicken Tenders Clarified
Can I use chicken thighs instead of chicken breasts?
Absolutely! Chicken thighs work great and tend to be more tender. Just trim any excess fat and cut them into similar-sized strips.
What if I don’t have breadcrumbs?
Crushed cornflakes or panko make excellent substitutes. Crushed crackers or even crushed pretzels can also create a crunchy coating on your chicken tenders.
How do I prevent the breading from falling off during cooking?
Make sure your chicken is dry before coating, press the breading firmly, and let the tenders rest for a few minutes after breading to help the coating adhere better.
Can these chicken tenders be made gluten-free?
Replace regular breadcrumbs with gluten-free breadcrumbs or crushed gluten-free crackers. Check that your seasonings are also gluten-free.
Are these chicken tenders freezer-friendly?
Freeze the breaded, uncooked tenders on a baking sheet, then transfer to a freezer bag. When ready to cook, bake directly from frozen, adding a few extra minutes to the cooking time.

Extra Crunch Oven Baked Chicken Tenders Recipe
- Total Time: 35-40 minutes
- Yield: 4 1x
Description
Crispy Baked Chicken Tenders turn your weeknight dinner into a crunchy, wholesome treat without the deep fryer mess. Grab some pantry staples and bake these golden, tender strips that your whole family will devour in minutes.
Ingredients
Main Ingredients:
- 1 lb chicken breasts or tenders
- 2 large eggs
- 1 cup panko breadcrumbs
Flavor Enhancers:
- ½ cup grated Parmesan cheese
- 1 teaspoon garlic powder
- 1 teaspoon paprika
- ½ teaspoon onion powder
- ½ teaspoon salt
- ¼ teaspoon black pepper
Coating Helpers:
- Olive oil spray
Instructions
- Slice chicken breasts into 1-inch strips, ensuring each piece is uniformly sized for even cooking. Pat your chicken completely dry with paper towels to help breading adhere perfectly.
- Create two separate mixing bowls: one with 2 beaten eggs, another with 1 cup panko breadcrumbs, ½ cup Parmesan cheese, 1 tsp garlic powder, 1 tsp paprika, ½ tsp onion powder, ½ tsp salt, and ¼ tsp black pepper.
- Season each chicken strip lightly with additional salt and pepper. Dunk each piece into beaten eggs, allowing excess to drip away smoothly.
- Roll the egg-coated strip through breadcrumb mixture, pressing gently to ensure complete coverage. For extra crispiness, repeat egg and breadcrumb coating process.
- Arrange a wire rack on top of a parchment-lined baking sheet. Position chicken strips across rack without touching, providing maximum air circulation.
- Spritz chicken strips lightly with olive oil spray to enhance golden crispness.
- Preheat oven to 400°F. Position rack in middle position for consistent heating.
- Bake chicken tenders for 20-25 minutes, rotating pan halfway through cooking time. Ensure internal temperature reaches 165°F using a meat thermometer.
- Remove from oven and let chicken rest for 3-4 minutes. This helps maintain crispy exterior and redistributes internal juices.
- Serve immediately with preferred dipping sauces like ranch or honey mustard.
Notes
- Always pat chicken strips completely dry before breading to ensure maximum crispiness and help breading stick perfectly.
- Using a wire rack on the baking sheet allows hot air to circulate around the tenders, creating an evenly crisp exterior that mimics deep-frying.
- For gluten-free options, swap regular breadcrumbs with almond meal or gluten-free panko, which deliver similar crunch and texture.
- Measuring the internal chicken temperature with a meat thermometer guarantees food safety and prevents overcooking, keeping the meat tender and juicy.
- Prep Time: 15 minutes
- Cook Time: 20-25 minutes
- Category: Oven-Fried
- Method: Baking
- Cuisine: American
Nutrition
- Serving Size: 4
- Calories: 270 kcal
- Sugar: 1 g
- Sodium: 520 mg
- Fat: 9 g
- Saturated Fat: 2.5 g
- Unsaturated Fat: 6 g
- Trans Fat: 0 g
- Carbohydrates: 17 g
- Fiber: 1.5 g
- Protein: 30 g
- Cholesterol: 140 mg
Daniel Navarro
Culinary Content Director
Expertise
Mexican-inspired Menus, Seasonal Restaurant Specials, Shared Plate Dining, Tequila Pairings, Chef-driven Recipes
Education
Daniel writes about bold flavors, chef-driven dishes, and the kind of restaurant moments that turn tacos, mezcal, and shared plates into a night worth repeating.