
Quick Oven Roasted Corn on the Cob Recipe
Easy oven roasted corn on the cob recipe serves up sweet, tender kernels with minimal effort and maximum flavor.
Summer cookouts and casual dinners become more enjoyable when you have a foolproof method that works every time.
Roasting concentrates natural sweetness while creating subtle caramelization that makes every bite satisfying.
No need to monitor a grill or boil water when a simple hands-off approach produces consistently delicious results.
Busy weeknights call for side dishes that practically cook themselves while you focus on other parts of the meal.
Feeding a crowd becomes stress-free since ovens accommodate multiple ears at once without constant attention.
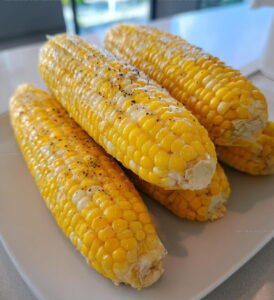
Golden kernels emerge from the oven ready to complement any main course from backyard barbecues to cozy family dinners.
Pull out a baking sheet and see how simple it can be to serve perfectly cooked corn every single time.
Best Reasons to Try Oven Roasted Corn on the Cob
Easy Oven Roasted Corn on the Cob Ingredient Overview
Main Ingredients:What Tools Are Needed for Roasted Corn on the Cob?
Cooking Process for Corn on the Cob with Juicy Results
Prep the Corn
Grab those 4 ears of corn and strip off all the husks. Make sure to get every last bit of those clingy silk strands off – nobody wants stringy corn!
Butter Up
Take 2 tablespoons of butter and get ready to get hands-on. Gently rub that butter all over each ear of corn, making sure every surface gets some love.
Season Like a Pro
Sprinkle salt and black pepper across the buttered corn. Don’t be shy – season each ear generously to bring out those delicious corn flavors.
Wrap It Tight
Grab some aluminum foil and wrap each buttered and seasoned ear completely. Fold the edges to create a snug little corn package that’ll keep all those flavors locked in.
Baking Time
Set your oven to exactly 400°F. Place the wrapped corn on a baking sheet, then slide that sheet right into the hot oven.
Roast to Perfection
Let the corn roast for exactly 30 minutes. The foil will help steam and roast the corn, creating a super tender and flavorful result.
Serve and Enjoy
Carefully pull the baking sheet out of the oven. Unwrap each ear, watching out for hot steam. Serve these golden beauties straight away while they’re piping hot and bursting with flavor.
Easy Notes for Sweet Oven-Roasted Corn
Easy Oven Roasted Corn On The Cob Alternative Versions
How To Serve Oven Roasted Corn On The Cob
Roasted Corn on the Cob Storage Guidance
Oven Roasted Corn on the Cob Helpful Q&A
Can I roast corn without foil?
Absolutely! Roast corn directly on the baking sheet. The kernels will get slightly charred and develop a deeper flavor.
Should the corn be fresh or can I use frozen?
Fresh corn works best, but frozen corn can work if thawed completely and patted dry before seasoning.
How do I know the corn is cooked perfectly?
The kernels will look plump, bright, and slightly puffy. When pierced, they should be tender but not mushy.
Can I add different seasonings?
Experiment with garlic powder, chili powder, or herbs like thyme. Each seasoning brings a unique taste to your corn.
What if my corn seems dry after roasting?
Brush extra melted butter or olive oil after unwrapping to add moisture and enhance flavor.
Can I prepare corn ahead of time?
Prep the corn and wrap in foil earlier in the day. Keep refrigerated and bake when ready to serve.
Easy Oven Roasted Corn On The Cob Recipe
- Total Time: 40 minutes
- Yield: 4 1x
Description
Roasted corn on the cob brings summer’s sweetest flavor straight to your plate with zero fuss. Seasoned with butter and a sprinkle of salt, this simple side dish delivers crisp, golden kernels that make your backyard barbecue complete.
Ingredients
Main Ingredients:
- 4 ears corn
Supporting Ingredients:
- 2 tablespoons butter
Seasoning:
- Salt, to taste
- Black pepper, to taste
Instructions
- Warm your oven to a toasty 400F, ensuring the perfect roasting environment for your corn.
- Strip each ear of corn completely, meticulously clearing away every strand of silky fiber.
- Take 2 tablespoons of butter and generously coat each corn ear, ensuring total coverage from tip to base.
- Sprinkle a pinch of salt and a dash of black pepper across your buttered corn, distributing seasonings evenly.
- Carefully envelop each seasoned ear in a snug aluminum foil wrap, sealing in all the delicious moisture.
- Arrange your foil-wrapped corn on a sturdy baking sheet, positioning them with care.
- Slide the baking sheet into the preheated 400F oven and roast for exactly 30 minutes, allowing the kernels to become tender and succulent.
- Extract the corn from the oven, gently unwrap each ear, and serve immediately while piping hot.
Notes
- Always choose fresh corn with bright green husks and plump kernels for the best flavor and texture.
- Softened butter spreads more evenly, helping to coat the corn completely and enhance its natural sweetness.
- For extra flavor, experiment with different seasonings like garlic powder, smoked paprika, or fresh herbs before wrapping in foil.
- If corn feels dry after roasting, brush with melted butter just before serving to restore moisture and add richness.
- Prep Time: 10 minutes
- Cook Time: 30 minutes
- Category: Roasted
- Method: Roasting
- Cuisine: American
Nutrition
- Serving Size: 4
- Calories: 123 kcal
- Sugar: 6 g
- Sodium: 102 mg
- Fat: 5 g
- Saturated Fat: 3 g
- Unsaturated Fat: 2 g
- Trans Fat: 0 g
- Carbohydrates: 18 g
- Fiber: 2 g
- Protein: 3 g
- Cholesterol: 15 mg
Daniel Navarro
Culinary Content Director
Expertise
Mexican-inspired Menus, Seasonal Restaurant Specials, Shared Plate Dining, Tequila Pairings, Chef-driven Recipes
Education
Daniel writes about bold flavors, chef-driven dishes, and the kind of restaurant moments that turn tacos, mezcal, and shared plates into a night worth repeating.