
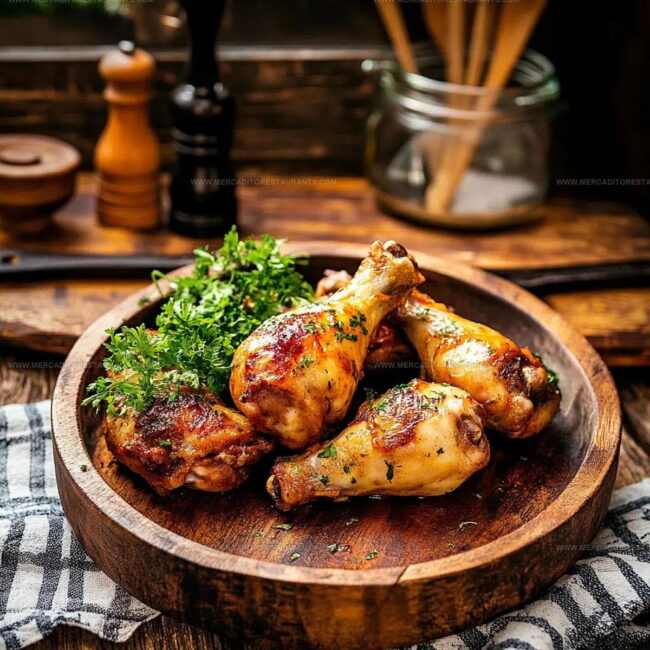
Crisp Chicken Leg in Oven Recipe with Golden Roasted Skin
Crisp chicken leg in oven recipe makes any weeknight dinner feel special without requiring fancy skills or loads of time.
Everyone loves that perfect golden exterior paired with juicy meat inside, and it's surprisingly easy to achieve.
Busy evenings become less stressful when such a reliable main course comes together with minimal fuss.
The aroma alone fills the kitchen with warmth and makes everyone eager to sit down together.
Whether you need something comforting after a long day or want to serve guests an impressive yet approachable dish, this works beautifully.
Each bite delivers that crave-worthy crunch balanced with tender, flavorful meat that keeps people coming back for seconds.
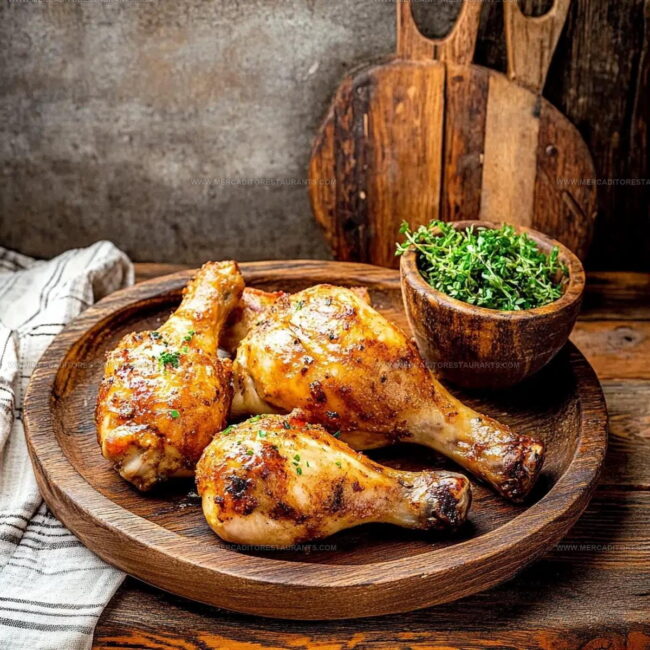
Why You’ll Love Oven-Roasted Chicken Legs
What Brings Big Flavor To These Oven-Baked Chicken Legs
Main Protein:Cooking Oil:Seasonings:Roasting Gear For Juicy Chicken Legs
Cooking Method for Oven-Baked Chicken Legs
Fire Up the Oven
Crank your oven to 425°F (220°C). Grab a baking sheet and line it with parchment paper or foil. For extra crispy skin, set a wire rack on top of the sheet. This trick helps air circulate around your chicken legs.
Dry Those Drumsticks
Grab some paper towels and thoroughly pat each chicken leg until completely dry. Removing moisture is the secret to getting that gorgeous golden, crispy exterior your family will adore.
Create the Seasoning Mix
In a small bowl, combine these ingredients:
Whisk everything together until well blended.
Coat the Chicken
Drizzle the seasoning mixture over 8 chicken legs. Use your hands to massage the spices into every nook and cranny. Make sure each drumstick is evenly coated for maximum flavor.
Arrange for Baking
Place the seasoned chicken legs on the prepared baking sheet, positioning them skin-side up. Space them slightly apart so they crisp up beautifully.
Roast to Perfection
Slide the baking sheet into the preheated oven. Roast for 35-45 minutes, watching for that gorgeous golden-brown skin. The chicken is done when the internal temperature hits 165°F (74°C).
Rest and Serve
After removing from the oven, let the chicken legs rest for 5 minutes. This helps the juices redistribute, ensuring each bite is succulent. Serve hot alongside your favorite sides and watch them disappear!
Tips For Crispy Skin And Tender Meat
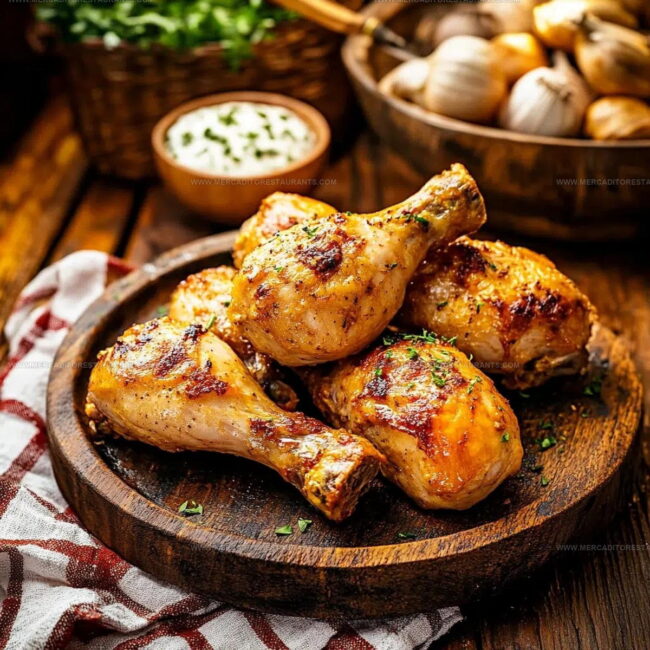
Variations For Seasoning Or Sauce On Chicken Legs
Serving These Chicken Legs With Satisfying Sides
Storage Tips For Juicy Chicken The Next Day
Chicken Leg FAQs For Dependable Dinners
Can I use frozen chicken legs?
Thaw chicken legs completely in the refrigerator before preparing. Frozen meat can lead to uneven cooking and potential food safety risks.
Do chicken legs need to be brined?
Brining helps keep the meat extra juicy, but it’s optional. If skipping brining, just ensure the chicken is patted super dry before seasoning.
How do experts get such crispy skin?
The key is removing moisture before seasoning and using high heat. A wire rack helps air circulate and creates that perfect crisp exterior we all crave.
What if chicken looks too dark while baking?
Cover loosely with foil to prevent burning. Check every 10 minutes to ensure even browning without scorching.
Can alternative seasonings work?
Absolutely! Swap spices based on preference. Mediterranean herbs, Cajun blends, or Asian-inspired seasonings transform the basic recipe beautifully.

Crisp Chicken Leg in Oven Recipe
- Total Time: 45-55 minutes
- Yield: 8 1x
Description
Roasted Chicken Leg brings comfort straight to my dinner table with minimal fuss. Crispy skin and tender meat make this simple dish a weeknight winner that requires just a few pantry staples and zero culinary expertise.
Ingredients
Protein:
- 8 chicken legs (drumsticks)
Seasonings:
- 1 teaspoon salt
- 1 teaspoon garlic powder
- 1 teaspoon onion powder
- 1 teaspoon smoked paprika
- ½ teaspoon black pepper
Cooking Fat:
- 2 tablespoons olive oil
Instructions
- Prepare your workspace by heating the oven to 425°F (220°C). Lay parchment paper or aluminum foil on a baking sheet and position a wire rack on top for maximum crispiness.
- Remove chicken legs from packaging and thoroughly dab each drumstick with paper towels to eliminate excess moisture.
- Create a seasoning blend by combining 2 tablespoons olive oil, 1 teaspoon garlic powder, 1 teaspoon onion powder, 1 teaspoon smoked paprika, 1 teaspoon salt, and ½ teaspoon black pepper in a small bowl.
- Massage the seasoning mixture thoroughly onto each chicken leg, ensuring complete and even coverage across all surfaces.
- Arrange the seasoned chicken legs on the wire rack, positioning them skin side up with slight spacing between each drumstick.
- Slide the baking sheet into the preheated oven and roast for 35-45 minutes, watching for a deep golden-brown skin color.
- Check internal temperature with a meat thermometer – chicken must reach 165°F (74°C) at its thickest part for safe consumption.
- Remove chicken from oven and allow drumsticks to rest for 5 minutes, which helps redistribute internal juices and maintain tenderness.
- Transfer crispy chicken legs to a serving platter and accompany with your preferred side dishes.
Notes
- Pat chicken legs completely dry before seasoning to ensure maximum crispiness and prevent steaming.
- Use a meat thermometer to check internal temperature, which guarantees perfectly cooked chicken without guesswork.
- For extra crispy skin, set oven to high heat and avoid overcrowding the baking sheet, allowing air circulation around each piece.
- Try variations like adding herbs like thyme or rosemary to the seasoning mix for more complex flavor profiles.
- Prep Time: 10 minutes
- Cook Time: 35-45 minutes
- Category: Baked
- Method: Baking
- Cuisine: American
Nutrition
- Serving Size: 8
- Calories: 254 kcal
- Sugar: 0 g
- Sodium: 293 mg
- Fat: 16 g
- Saturated Fat: 4.3 g
- Unsaturated Fat: 11.7 g
- Trans Fat: 0 g
- Carbohydrates: 1 g
- Fiber: 0.5 g
- Protein: 23 g
- Cholesterol: 94 mg
Isabella Romero
Hospitality & Beverage Editor
Expertise
Cocktail Culture, Tequila and Mezcal Knowledge, Guest Experience Writing, Restaurant Trends, Event Dining Guides
Education
- Program: B.A. in Hospitality Management
- Focus: Studied hospitality through a program built around theory and application, with practical preparation for restaurant and guest-experience careers in Chicago’s hospitality industry.
Wine & Spirit Education Trust (WSET)Isabella brings together cocktails, food culture, social dining, and the thoughtful details that make a meal feel memorable. Her content blends atmosphere, flavor, and hospitality in a warm, polished style that helps readers connect with the full dining experience, from the first sip to the last bite.