Cornflake Baked Chicken Recipe with Crunchy Golden Crust
Cornflake baked chicken recipe is one of those crowd-pleasing dinners that feels both comforting and exciting at the same time.
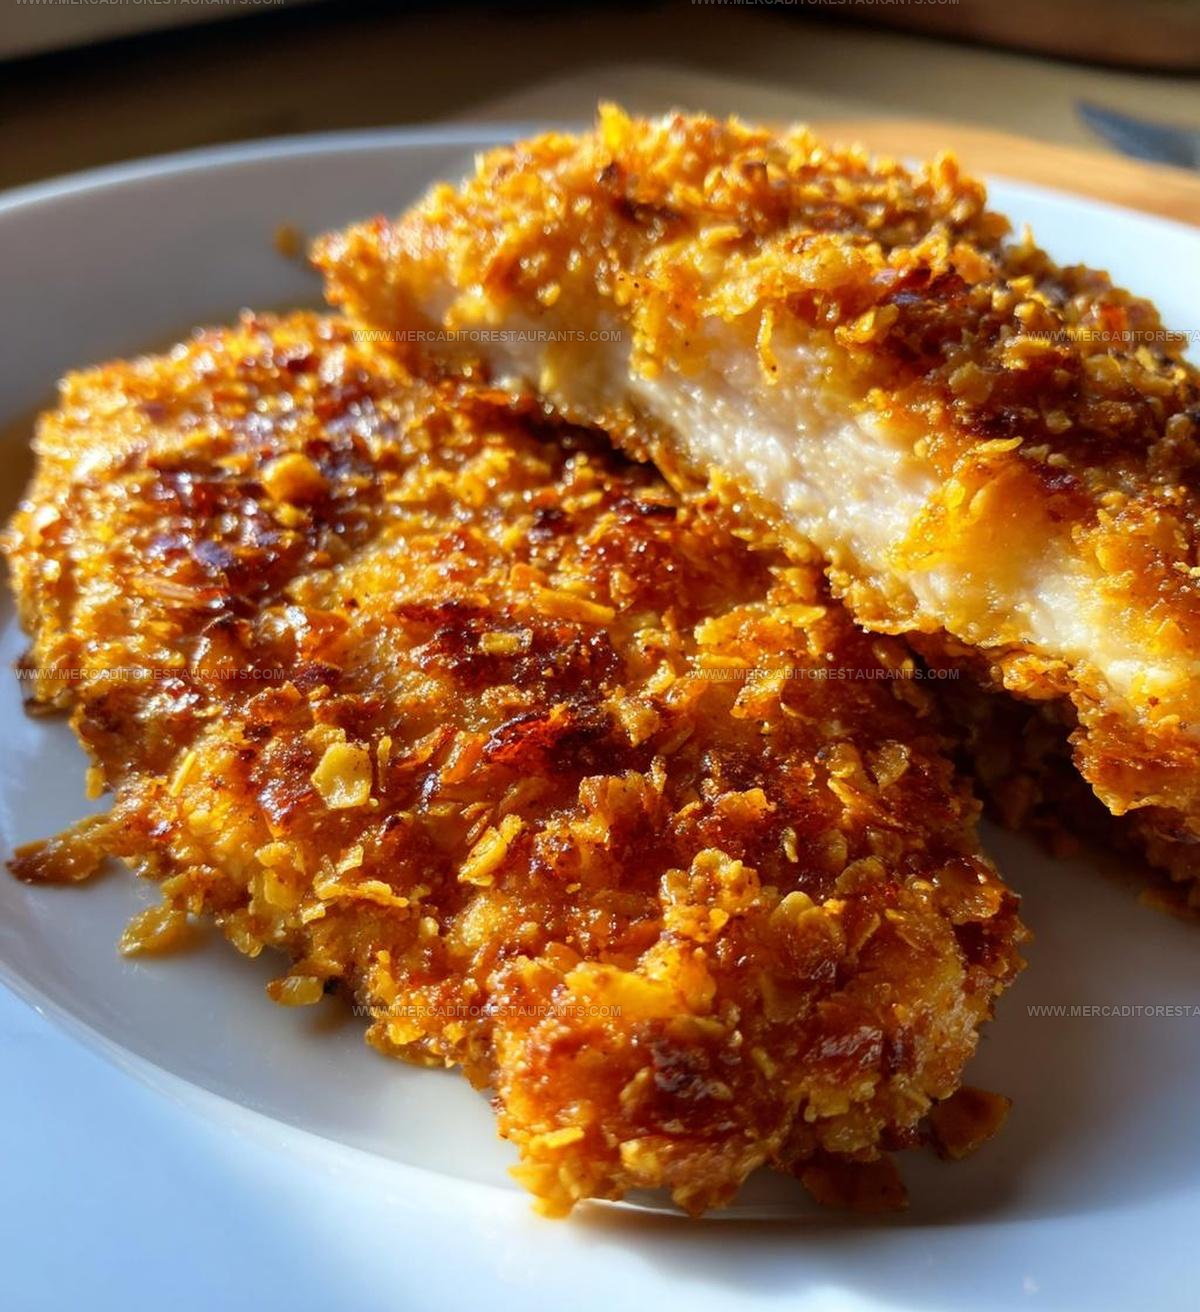
It offers a satisfying crunch that contrasts beautifully with juicy, tender meat inside.
Busy weeknights become instantly easier when you have a reliable option that comes together without much fuss.
It's also incredibly adaptable to different flavor profiles and dietary preferences.
You can feel confident serving it for casual suppers or when friends stop by unexpectedly.
Everything about it screams homestyle goodness with just enough twist to keep things interesting, so go check out how simple and delicious it can be.
Why You’ll Love Cornflake Baked Chicken’s Crunch
Complete Ingredient List for Cornflake Baked Chicken
Chicken Proteins:Breading Base:Liquid Marinade:Seasonings:Kitchen Tools for Cornflake Baked Chicken
Step By Step Instructions For Cornflake Chicken
Prep the Oven
Heat the oven to exactly 400 degrees Fahrenheit. This high temperature will help your chicken get super crispy.
Create the Buttermilk Bath
Mix the buttermilk with seasonings in a wide bowl. You’ll want to combine these ingredients thoroughly:
Soak the Chicken
Dunk each of the 4 chicken breasts into the seasoned buttermilk mixture. Make sure every part gets a good coating so the breading will stick perfectly.
Prepare the Crunch Coating
Grab those cornflakes and crush them into small pieces. You can do this by placing them in a sealed plastic bag and gently rolling with a rolling pin.
Coat the Chicken
Roll each buttermilk-covered chicken breast in the crushed cornflakes. Press the flakes gently to help them stick to the entire surface of the chicken.
Baking Time
Place the coated chicken breasts on a clean baking sheet. Spread them out so they’re not touching each other. Slide the sheet into the preheated oven.
Cook to Perfection
Bake for exactly 25-30 minutes. Check that the internal temperature reaches 165 degrees Fahrenheit. The chicken should look golden brown and crisp when it’s done.
Serve Immediately
Pull the chicken out of the oven and let it rest for just a few minutes before serving. The crispy coating will stay crunchy and delicious.
Smart Cooking Tips For Cornflake Baked Chicken
Cornflake Baked Chicken With Crunch Options
Best Crunchy Ways To Serve Cornflake Baked Chicken
Cornflake Baked Chicken Storage Advice
Cornflake Baked Chicken FAQs
Can I use chicken thighs instead of breasts?
Absolutely! Chicken thighs work wonderfully and will give you a juicier result. Just adjust cooking time slightly since thighs might take a few extra minutes to cook through.
Is buttermilk necessary?
Buttermilk helps tenderize your chicken and creates a perfect coating base. If you don’t have buttermilk, mix regular milk with a tablespoon of vinegar or lemon juice as a quick substitute.
How do I know the chicken is fully cooked?
Use a meat thermometer – chicken should reach an internal temperature of 165°F (74°C). The golden cornflake crust and clear juices are also good indicators of doneness.
Can I make this gluten-free?
Replace regular cornflakes with gluten-free cornflakes and ensure your buttermilk and spices are certified gluten-free. The recipe adapts easily for gluten-sensitive diets.
What if my cornflakes don’t stick well?
Make sure your chicken is thoroughly coated in buttermilk mixture before rolling in crushed cornflakes. Press the flakes gently to help them adhere better.

Cornflake Baked Chicken Recipe
- Total Time: 35-40 minutes
- Yield: 4 1x
Description
Cornflake Baked Chicken turns ordinary chicken into a crispy, golden delight that’ll have your family begging for seconds. Crush those cornflakes, coat the chicken, and bake until perfectly crunchy for a simple dinner that beats takeout any day.
Ingredients
Protein:
- 4 chicken breasts
Coating:
- 2 cups cornflakes
- 1 teaspoon paprika
- 1 teaspoon garlic powder
- 1 teaspoon onion powder
Liquid and Seasoning:
- 1 cup buttermilk
- Salt to taste
- Pepper to taste
Instructions
- Crush 2 cups of cornflakes into rough, chunky crumbs using your hands or a rolling pin for maximum crispiness.
- Pour 1 cup buttermilk into a medium bowl and blend in 1 teaspoon each of garlic powder, onion powder, and paprika. Add a pinch of salt and pepper to create a zesty marinade.
- Submerge each chicken breast completely in the buttermilk mixture, ensuring every inch gets coated for maximum flavor absorption.
- Transfer a buttermilk-covered chicken breast directly into the cornflake crumbs, pressing firmly to help the coating adhere completely.
- Rotate and press the chicken, making sure the entire surface is evenly covered with crispy cornflake crumbs.
- Arrange the breaded chicken pieces on a clean baking sheet, leaving space between them for even heat circulation.
- Heat the oven to 400°F and position the rack in the center position for consistent cooking.
- Slide the baking sheet into the preheated oven and bake for precisely 25-30 minutes until the chicken reaches an internal temperature of 165°F.
- Check the chicken’s golden-brown exterior and crispy texture before removing from the oven.
- Let the chicken rest for 3-5 minutes to seal in the juices before serving hot and crunchy.
Notes
- Crush the cornflakes finely for the crispiest coating that sticks perfectly to the chicken.
- Pat the chicken breasts completely dry before dipping in buttermilk to help the coating adhere better.
- For a gluten-free version, swap regular cornflakes for gluten-free cornflakes and check seasoning ingredients.
- Make the dish spicier by adding cayenne pepper or hot sauce to the buttermilk marinade for extra kick.
- Prep Time: 10 minutes
- Cook Time: 25-30 minutes
- Category: Baked
- Method: Baking
- Cuisine: American
Nutrition
- Serving Size: 4
- Calories: 325 kcal
- Sugar: 2 g
- Sodium: 450 mg
- Fat: 7 g
- Saturated Fat: 2 g
- Unsaturated Fat: 3.5 g
- Trans Fat: 0 g
- Carbohydrates: 20 g
- Fiber: 1.5 g
- Protein: 45 g
- Cholesterol: 95 mg
Isabella Romero
Hospitality & Beverage Editor
Expertise
Cocktail Culture, Tequila and Mezcal Knowledge, Guest Experience Writing, Restaurant Trends, Event Dining Guides
Education
- Program: B.A. in Hospitality Management
- Focus: Studied hospitality through a program built around theory and application, with practical preparation for restaurant and guest-experience careers in Chicago’s hospitality industry.
Wine & Spirit Education Trust (WSET)Isabella brings together cocktails, food culture, social dining, and the thoughtful details that make a meal feel memorable. Her content blends atmosphere, flavor, and hospitality in a warm, polished style that helps readers connect with the full dining experience, from the first sip to the last bite.