
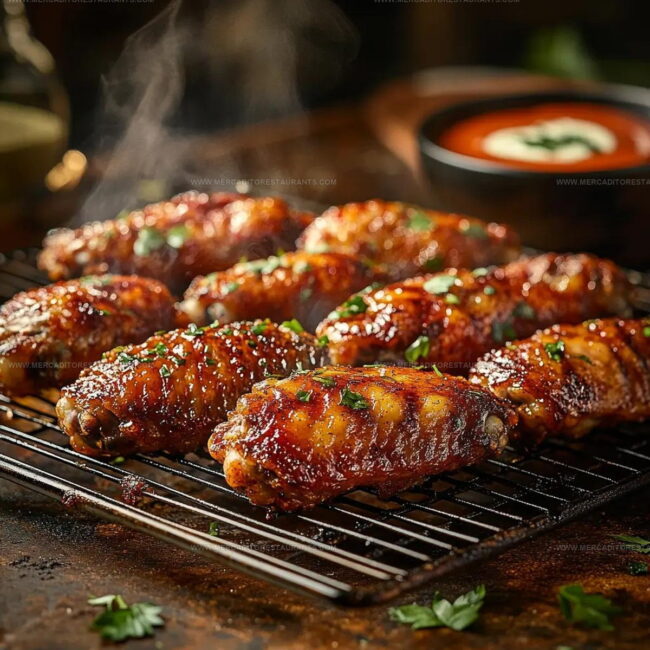
Crispy Baked Chicken Wings Recipe for Game Day Gatherings
Crispy oven-baked chicken wings promise pure deliciousness for anyone craving seriously addictive finger food.
Weeknight dinners and game day gatherings suddenly become spectacular with these golden, crunchy delights.
Perfectly seasoned wings offer maximum flavor without complicated preparation techniques.
Preparing wings in the oven eliminates messy deep-frying while maintaining incredible texture and taste.
Home cooks appreciate simple methods that produce restaurant-worthy results without extensive culinary skills.
Minimal effort yields maximum satisfaction for hungry crowds seeking mouthwatering protein centerpieces.
Weekend entertaining or casual family meals will feel extraordinary with these crowd-pleasing wings ready to impress everyone at the table.
Standout Features Of Oven Chicken Wings
Core Ingredients For Chicken Wings In The Oven
Main Proteins:Supporting Seasonings:Cooking Oils:Required Kitchen Tools for Chicken Wings In The Oven
Preparing Chicken Wings in the Oven Step by Step
Prep the Chicken
Pat those chicken wings bone-dry with paper towels. Grab 2 pounds of wings and really press those towels to remove every bit of moisture. Set the wings on a wire rack in the refrigerator uncovered for 8 hours – this trick helps make them super crispy.
Get the Baking Station Ready
Preheat your oven to 250°F. Line a baking sheet with aluminum foil and set a wire rack on top. This setup will help air circulate around the wings.
Mix the Seasoning Blend
Grab a small bowl and combine your spice mix:
Stir these together until they’re well mixed.
Season the Wings
Pour 2 tablespoons olive oil over the wings in a large bowl. Sprinkle the entire spice mixture across the wings. Toss them around until each wing gets a perfect, even coating.
Arrange on the Rack
Spread the wings skin-side up on the wire rack. Make sure they’re not touching each other – this helps them get crispy all over.
First Bake Cycle
Bake at 250°F for exactly 30 minutes. This slow start helps render the fat.
Crank Up the Heat
Without opening the oven door, bump the temperature up to 425°F. This is where the magic happens for that crispy skin.
Final Roasting
Roast for 40-50 minutes, spinning the pan halfway through. Watch for that gorgeous golden-brown color developing on the skin.
Rest and Serve
Pull the wings out of the oven and let them rest for 5 minutes. This helps the juices settle and keeps them super tender.
Things Worth Knowing About Oven Chicken Wings
Which Fresh Takes Elevate Oven Chicken Wings
Best Ways To Plate Oven Baked Chicken Wings
What’s The Proper Storage For Oven Chicken Wings
Oven Chicken Wings Common Questions
Why do I need to blot the wings dry?
Getting rid of excess moisture helps your chicken wings become super crispy instead of steaming in the oven.
Can I skip the refrigeration step?
Refrigerating uncovered for several hours helps dry out the skin, which creates that incredible crunch you’re looking for.
What if I don’t have baking powder?
Baking powder is crucial for getting crispy skin. Without it, your wings won’t develop the same golden, crunchy exterior.
How do I know when the wings are perfectly done?
Look for deep golden-brown skin that’s crisp to the touch. The internal temperature should reach 165°F at the thickest part.
Can I use frozen chicken wings?
Fresh wings work best. Frozen wings have extra moisture that can make achieving crispy skin more challenging.
What happens if my wings touch on the baking rack?
Spacing is important! Wings that touch won’t crisp up evenly and might steam instead of getting that desired crunchy texture.

Chicken Wings In The Oven Recipe
- Total Time: 9 hours 25-35 minutes
- Yield: 4 1x
Description
Crispy Chicken Wings emerge from your oven as the ultimate crowd-pleasing snack that delivers maximum flavor with minimal effort. Seasoned with simple spices and baked until golden brown, these wings will make game day or movie night deliciously memorable.
Ingredients
Main Proteins:
- 2 pounds fresh chicken wings
Supporting Seasonings:
- 2 teaspoons baking powder
- 1 teaspoon salt
- ½ teaspoon freshly ground black pepper
- ½ teaspoon garlic powder
- ½ teaspoon paprika
- ¼ teaspoon cayenne pepper
Cooking Oils:
- 2 tablespoons olive oil
Instructions
- Thoroughly blot 2 pounds of chicken wings with paper towels until completely dry. Refrigerate uncovered on a wire rack for 8 hours to maximize crispiness.
- Set your oven to 250°F. Cover a baking sheet with aluminum foil and position a wire rack on top.
- Combine 2 teaspoons baking powder, 1 teaspoon salt, ½ teaspoon black pepper, ½ teaspoon garlic powder, ½ teaspoon paprika, and ¼ teaspoon cayenne in a small mixing bowl.
- Pour 2 tablespoons oil over your wings in a large bowl. Sprinkle the spice mixture across the wings and toss until every piece gets an even coating.
- Position wings skin-side up on the rack, making sure they aren’t touching each other.
- Bake at 250°F for exactly 30 minutes.
- Without opening the oven door, increase the temperature to 425°F.
- Continue roasting for 40-50 minutes, rotating the pan halfway through cooking. Watch for golden, crispy skin that turns deep brown.
- Remove from the oven and allow wings to rest for 5 minutes before serving.
Notes
- The key to crispy wings is thorough drying, so take time to remove all moisture with paper towels before seasoning.
- Letting wings sit uncovered in the refrigerator overnight helps draw out extra moisture and creates an incredibly crunchy exterior.
- Using baking powder instead of flour helps break down proteins and creates that perfect crispy texture without added calories.
- When baking, make sure wings are spread out on the rack and not touching each other, which allows hot air to circulate and ensures even, crisp cooking.
- Prep Time: 8 hours 15 minutes
- Cook Time: 1 hours 10-20 minutes
- Category: Baked
- Method: Baking
- Cuisine: American
Nutrition
- Serving Size: 4
- Calories: 312 kcal
- Sugar: 0 g
- Sodium: 526 mg
- Fat: 22 g
- Saturated Fat: 3 g
- Unsaturated Fat: 18 g
- Trans Fat: 0 g
- Carbohydrates: 1 g
- Fiber: 0.3 g
- Protein: 27 g
- Cholesterol: 99 mg
Daniel Navarro
Culinary Content Director
Expertise
Mexican-inspired Menus, Seasonal Restaurant Specials, Shared Plate Dining, Tequila Pairings, Chef-driven Recipes
Education
Daniel writes about bold flavors, chef-driven dishes, and the kind of restaurant moments that turn tacos, mezcal, and shared plates into a night worth repeating.