Chicken Chilaquiles Casserole Recipe With Crispy Tortillas
Chicken chilaquiles casserole recipe lovers know that few dishes combine comfort and bold flavors quite like what comes together in one pan.
Mexican breakfast traditions meet weeknight dinner convenience in a format that satisfies cravings any time of day.
Layers of satisfying textures create something special that feels both homey and exciting at the same time.
Families gather around the table for meals that bring everyone together without requiring hours in the kitchen.
Busy schedules don't mean giving up on dishes packed with authentic taste and heartwarming appeal.
Breakfast for dinner becomes a celebration when something so flavorful takes center stage, and leftovers rarely make it to the next day because everyone comes back for more.
What Sets Chicken Chilaquiles Casserole Apart
Chicken Chilaquiles Casserole Core Ingredients
Main Ingredients:Cheese and Dairy:Flavor Enhancers:Optional Toppings:Equipment Needed for Chicken Chilaquiles Casserole
Chicken Chilaquiles Casserole Preparation
Warm Up the Oven
Crank your oven to 375°F and grab a casserole dish. A quick spray of cooking oil will keep everything from sticking.
Create the Sauce Magic
Grab a mixing bowl and whip together these tasty ingredients:
Stir in 1/2 cup sour cream until the sauce looks smooth and creamy.
Build the First Layer
Spread 3 cups of thick tortilla chips across the bottom of your greased dish. This creates a crunchy foundation for your casserole.
Add the Chicken Layer
Sprinkle 1 cup of shredded chicken over the chips. Pour half the sauce mixture across the chicken, making sure everything gets a good coating.
Cheese Time
Scatter 3/4 cup of shredded Mexican cheese blend over the saucy layer. This is where the deliciousness starts to get serious.
Repeat the Layers
Do another round of chips, the remaining 1 1/2 cups chicken, and the rest of the sauce. Top with another 3/4 cup of cheese.
Bake to Perfection
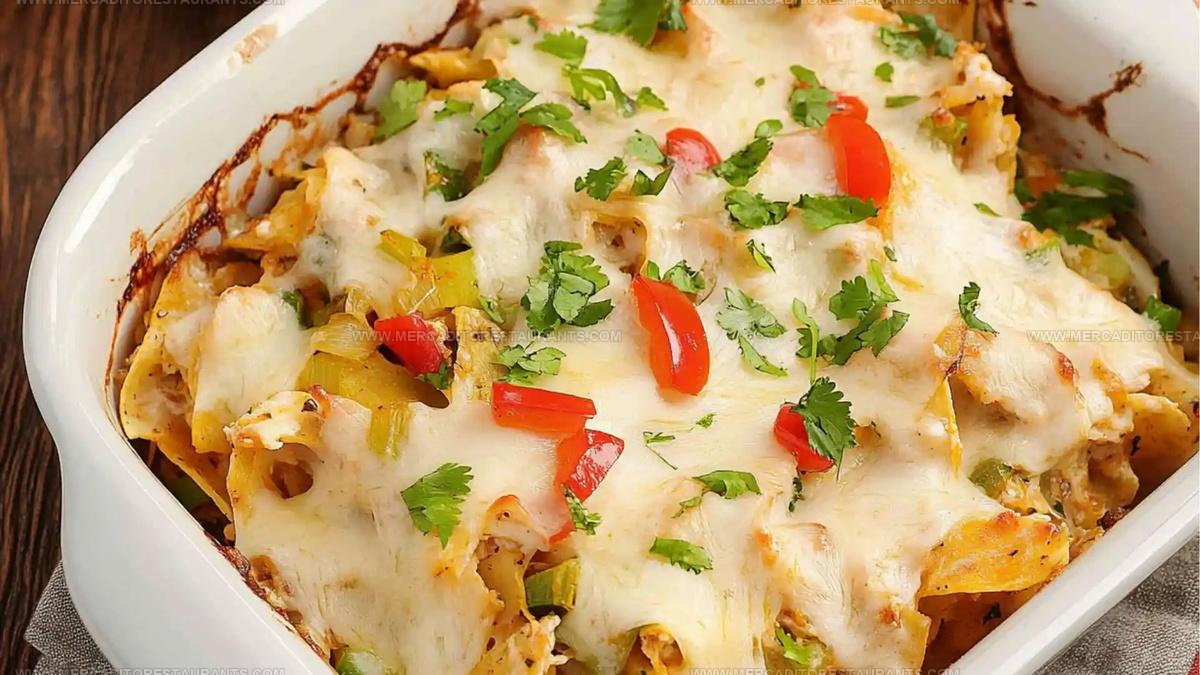
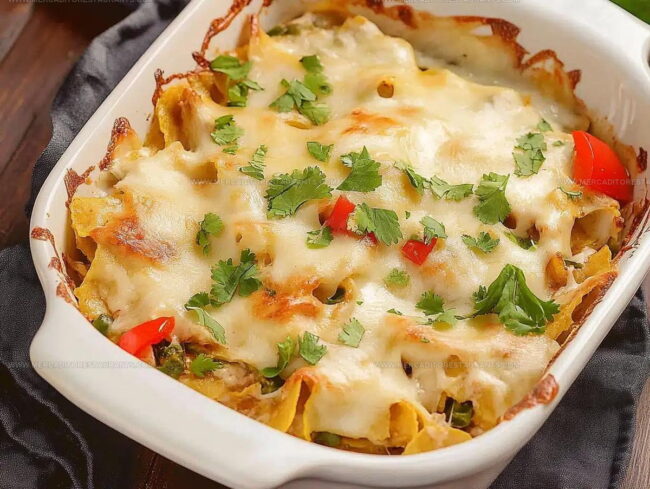
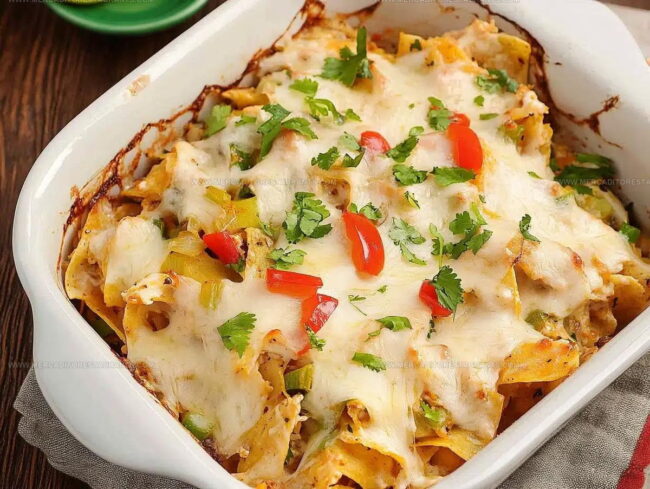
Cover the dish with foil and slide it into the 375°F oven. Bake for 20 minutes. Then remove the foil and bake another 10 minutes until the cheese looks melted and slightly golden.
Fresh Finishing Touches
Sprinkle 1/2 cup chopped red onions and some fresh cilantro on top. Serve hot and watch everyone dig in!
Good to Know Before Baking Chilaquiles Casserole
How Can Chicken Chilaquiles Casserole Be Adjusted
Best Serving Options for Chicken Chilaquiles Casserole
How To Store Chicken Chilaquiles Casserole
Frequently Asked Questions About Chicken Chilaquiles
Can I use store-bought rotisserie chicken?
Absolutely! Rotisserie chicken works perfectly and saves tons of prep time. Just shred it before adding to the casserole.
What if I cannot find corn tortilla chips?
Corn tortilla chips work best, but you can substitute with flour tortilla chips or even torn corn tortillas for a similar texture and flavor profile.
Are green chilies spicy?
Green chilies typically offer mild heat with lots of flavor. If you prefer less spice, choose mild canned green chilies or reduce the amount used.
How can I make this dish more protein-packed?
Consider adding black beans or extra shredded chicken to boost protein content. Another option is topping with scrambled eggs before serving.
Can this casserole be assembled ahead of time?
Definitely! Prepare the entire casserole, cover with plastic wrap, and refrigerate for up to 24 hours before baking. Just add a few extra minutes to baking time.
Do I need special equipment to make this recipe?
No special equipment required. A standard 9×13 casserole dish, mixing bowl, and basic kitchen tools are all you need to create this delicious meal.

Chicken Chilaquiles Casserole Recipe
- Total Time: 45 minutes
- Yield: 6 1x
Description
Chicken Chilaquiles Casserole brings hearty Mexican-inspired layers straight to your dinner table with crispy tortilla chips, tender chicken, and zesty salsa. Melted cheese and a sprinkle of fresh cilantro make this one-pan meal a total crowd-pleaser that delivers maximum flavor with minimal effort.
Ingredients
Chicken:
- 2.5 cups shredded chicken
Chips and Sauce:
- 6 cups tortilla chips
- 2 cups red enchilada sauce or tomato salsa
Seasonings and Toppings:
- 1.5 cups shredded cheese
- 0.5 cup sour cream
- 0.5 cup chopped red onion
- 1 can diced green chilies
- 1 teaspoon cumin
- 1 teaspoon garlic powder
- Salt and pepper
- Fresh cilantro
- Optional: avocado
- Optional: fried or poached eggs
- Optional: sliced jalapenos
Instructions
- Preheat your oven to 375°F and spray a 9×13-inch baking dish with cooking spray to prevent sticking.
- Grab a medium bowl and whisk 2 cups red enchilada sauce with 1 teaspoon cumin, 1 teaspoon garlic powder, 4 oz green chilies, salt, and pepper until smoothly combined.
- Stir ½ cup sour cream into the sauce mixture, creating a rich and creamy base that will enhance your casserole’s flavor.
- Spread 3 cups of thick tortilla chips across the bottom of your prepared baking dish, creating an even foundation for the layers.
- Sprinkle 1 ¼ cups shredded chicken over the chips, ensuring consistent coverage across the entire surface.
- Pour half of your saucy mixture evenly across the chicken layer, allowing the liquid to seep between the chips and chicken.
- Scatter ¾ cup shredded cheese over the sauce, making sure to distribute it uniformly.
- Repeat the layering process with remaining 3 cups chips, 1 ¼ cups chicken, sauce, and ¾ cup cheese.
- Cover the casserole with aluminum foil and bake at 375°F for 20 minutes, trapping moisture and allowing flavors to meld.
- Remove foil and continue baking for 10 more minutes until cheese turns golden and bubbly.
- Sprinkle ½ cup chopped red onions across the top and garnish with fresh cilantro.
- Let the casserole rest for 5 minutes before serving to help it set and cool slightly.
Notes
- Corn tortilla chips work best for authentic flavor, but if they’re getting soft, quickly crisp them in a hot skillet before assembling the casserole.
- For a gluten-free version, use corn tortilla chips and verify your enchilada sauce doesn’t contain wheat-based thickeners.
- When shredding chicken, warm rotisserie chicken makes the process faster and adds extra rich flavor to your dish.
- Choose a medium-heat enchilada sauce to control spiciness, allowing everyone at the table to enjoy the casserole’s complex taste profile.
- Prep Time: 15 minutes
- Cook Time: 30 minutes
- Category: Casseroles
- Method: Baking
- Cuisine: Mexican
Nutrition
- Serving Size: 6
- Calories: 380 kcal
- Sugar: 3 g
- Sodium: 680 mg
- Fat: 18 g
- Saturated Fat: 8 g
- Unsaturated Fat: 9 g
- Trans Fat: 0.2 g
- Carbohydrates: 28 g
- Fiber: 4 g
- Protein: 30 g
- Cholesterol: 75 mg
Isabella Romero
Hospitality & Beverage Editor
Expertise
Cocktail Culture, Tequila and Mezcal Knowledge, Guest Experience Writing, Restaurant Trends, Event Dining Guides
Education
- Program: B.A. in Hospitality Management
- Focus: Studied hospitality through a program built around theory and application, with practical preparation for restaurant and guest-experience careers in Chicago’s hospitality industry.
Wine & Spirit Education Trust (WSET)Isabella brings together cocktails, food culture, social dining, and the thoughtful details that make a meal feel memorable. Her content blends atmosphere, flavor, and hospitality in a warm, polished style that helps readers connect with the full dining experience, from the first sip to the last bite.