
Baked Salmon Sushi Cups Recipe for Fresh Seafood Lovers
Baked salmon sushi cups bring all the flavors of sushi night into a fun, bite-sized format that works for any occasion.
Whether feeding a crowd at game day or hosting a casual dinner party, these little cups deliver big on taste while looking impressively put together.
The concept balances comfort and creativity in a way that feels approachable yet special enough to serve when company comes over.
No rolling mat or special skills required here, just simple assembly that anyone can handle on a busy weeknight.
The combination satisfies sushi cravings without the fuss, making it perfect for when you want something different but don't have hours to spend in the kitchen.
If you crave sushi-inspired meals but want a simpler approach, this recipe will become a regular favorite in rotation.
What Sets Baked Salmon Sushi Cups Apart
What This Salmon Sushi Cup Recipe Is Made Of
Rice Base:Protein and Flavor:Finishing Touches:Tools Used for Salmon Sushi Cups
How to Make Baked Salmon Sushi Cups
Prepare Rice
Grab your 1 cup of sushi rice and cook it according to the package directions until it’s perfectly tender. Once done, let the rice cool down just a bit so it’s not steaming hot.
Create Seasoning
Snag a microwave-safe bowl and toss in:
Zap it in the microwave until the sugar dissolves completely. Stir this mixture into your cooled rice to give it that classic sushi flavor.
Prepare Salmon Mixture
Grab a mixing bowl and combine your salmon with these tasty ingredients:
Mix everything until the salmon is nicely coated with the sauce.
Set Up Muffin Tin
Crank your oven to 400°F. Spray a muffin tin with cooking spray to prevent sticking. Cut the 6 nori sheets into squares that fit perfectly into each muffin cup.
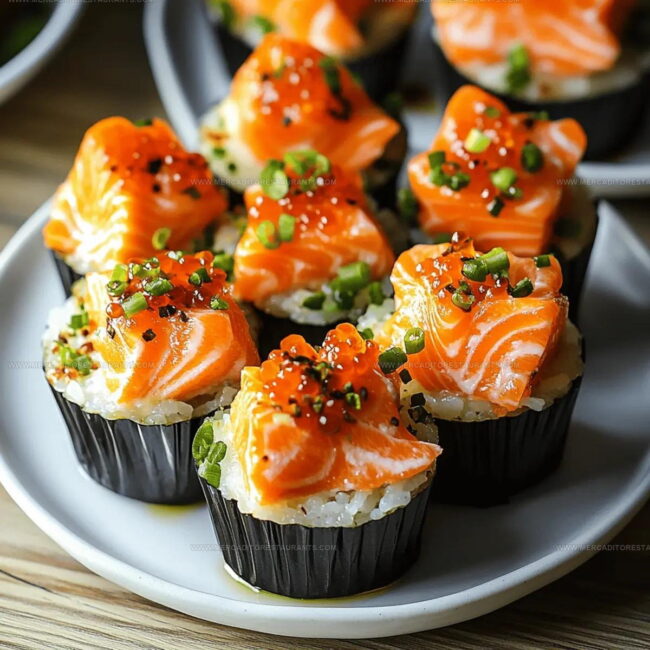
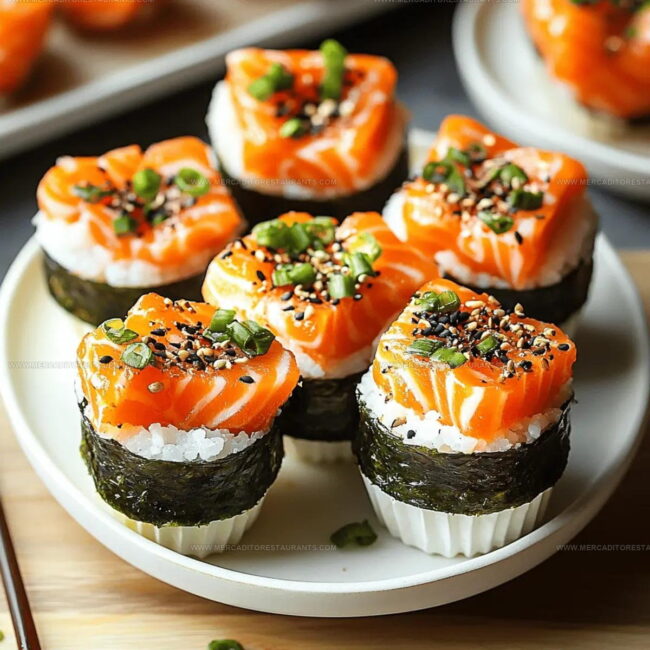
Build Sushi Cups
Press a nori square into each muffin tin cup. Spoon a layer of seasoned rice over the nori, then top with the saucy salmon mixture.
Bake to Perfection
Slide the muffin tin into the preheated 400°F oven. Bake for 15 minutes until the salmon looks cooked through and the tops are golden brown.
Finish and Serve
Let the sushi cups cool for a couple of minutes. Sprinkle with:
Serve these warm and watch them disappear in minutes!
Best Tips for Baked Salmon Sushi Cups
Baked Salmon Sushi Cup Flavor Twists
How Should Salmon Sushi Cups Be Served
Salmon Sushi Cup Storage Guide
Baked Salmon Sushi Cups Common Questions
What makes this salmon sushi bake different from traditional sushi?
These bites combine the flavors of sushi with the convenience of a baked dish, creating a fun and easy way to enjoy salmon without rolling individual pieces.
Can I use a different type of fish?
Salmon works best, but you could substitute with tuna or another firm fish that takes well to baking.
Do I need special equipment to make these?
A standard muffin tin is all you need to create these perfect individual portions.
How spicy are these salmon bites?
The sriracha adds a mild kick, but you can adjust the amount to suit your heat preference.
Are these good for meal prep?
Absolutely! These salmon bites reheat nicely and can be stored in the refrigerator for 2-3 days.
Is this dish gluten-free?
Not as written, since soy sauce contains gluten. Use tamari or a gluten-free soy sauce to make the recipe gluten-free.

BiteSized Baked Salmon Sushi Cups Recipe
- Total Time: 35 minutes
- Yield: 4 1x
Description
Baked salmon sushi cups bring Japanese-inspired flavors right to your dinner table in a fun, portable package. Packed with creamy rice, tender salmon, and crisp veggies, these little cups make your meal exciting and delicious.
Ingredients
Main Ingredients:
- 8 oz Salmon
- 1 cup Sushi Rice
- 6 sheets Nori Sheets
Flavor Enhancers:
- 2 tablespoons Light Soy Sauce
- 2 tablespoons Kewpie Mayo
- 1 tablespoon Sriracha
- 1 tablespoon Sesame Oil
- 1 tablespoon Furikake
Supporting Ingredients:
- 2 tablespoons Rice Vinegar
- 1 tablespoon White Sugar
- 2 stalks Green Onion
- 1 tablespoon Cooking Spray
Instructions
- Rinse your sushi rice under cold water until the water runs clear. Cook 1 cup of rice according to package directions, creating a tender and fluffy base for your cups.
- Combine 2 tbsp rice vinegar and 1 tbsp white sugar in a microwave-safe bowl. Heat for 20 seconds until sugar completely dissolves, then gently fold into your cooled rice.
- Spray a 12-cup muffin tin with cooking spray to prevent sticking. Preheat your oven to 400°F.
- Dice 8 oz salmon into small, uniform cubes. Mix salmon with 2 tbsp light soy sauce, 2 tbsp Kewpie mayo, 1 tbsp sriracha, and 1 tbsp sesame oil until salmon is evenly coated.
- Cut 6 nori sheets into squares that perfectly fit inside each muffin tin cavity. Press a nori square into each greased cup.
- Distribute your seasoned rice evenly across the nori squares, pressing gently to create a compact base. Top each rice layer with the prepared salmon mixture.
- Bake at 400°F for 15 minutes, watching carefully until salmon is fully cooked and edges turn golden brown.
- Remove from oven and let cool for 2-3 minutes. Sprinkle 1 tbsp furikake over the tops and garnish with thinly sliced green onions.
- Drizzle additional sriracha or spicy mayo for extra flavor before serving these warm, compact sushi cups.
Notes
- Check your rice texture carefully to ensure it’s not too sticky or dry when mixing with vinegar and sugar.
- Line muffin tins with the nori carefully to create a neat base that holds the salmon mixture securely.
- Use high-quality fresh salmon for the best flavor and most tender result in these mini bites.
- Adjust sriracha amount based on your heat preference, keeping the balance of spice and richness.
- Prep Time: 20 minutes
- Cook Time: 15 minutes
- Category: Baked
- Method: Baking
- Cuisine: Japanese
Nutrition
- Serving Size: 4
- Calories: 230 kcal
- Sugar: 4 g
- Sodium: 500 mg
- Fat: 12 g
- Saturated Fat: 2 g
- Unsaturated Fat: 8 g
- Trans Fat: 0 g
- Carbohydrates: 22 g
- Fiber: 1 g
- Protein: 14 g
- Cholesterol: 30 mg
Daniel Navarro
Culinary Content Director
Expertise
Mexican-inspired Menus, Seasonal Restaurant Specials, Shared Plate Dining, Tequila Pairings, Chef-driven Recipes
Education
Daniel writes about bold flavors, chef-driven dishes, and the kind of restaurant moments that turn tacos, mezcal, and shared plates into a night worth repeating.