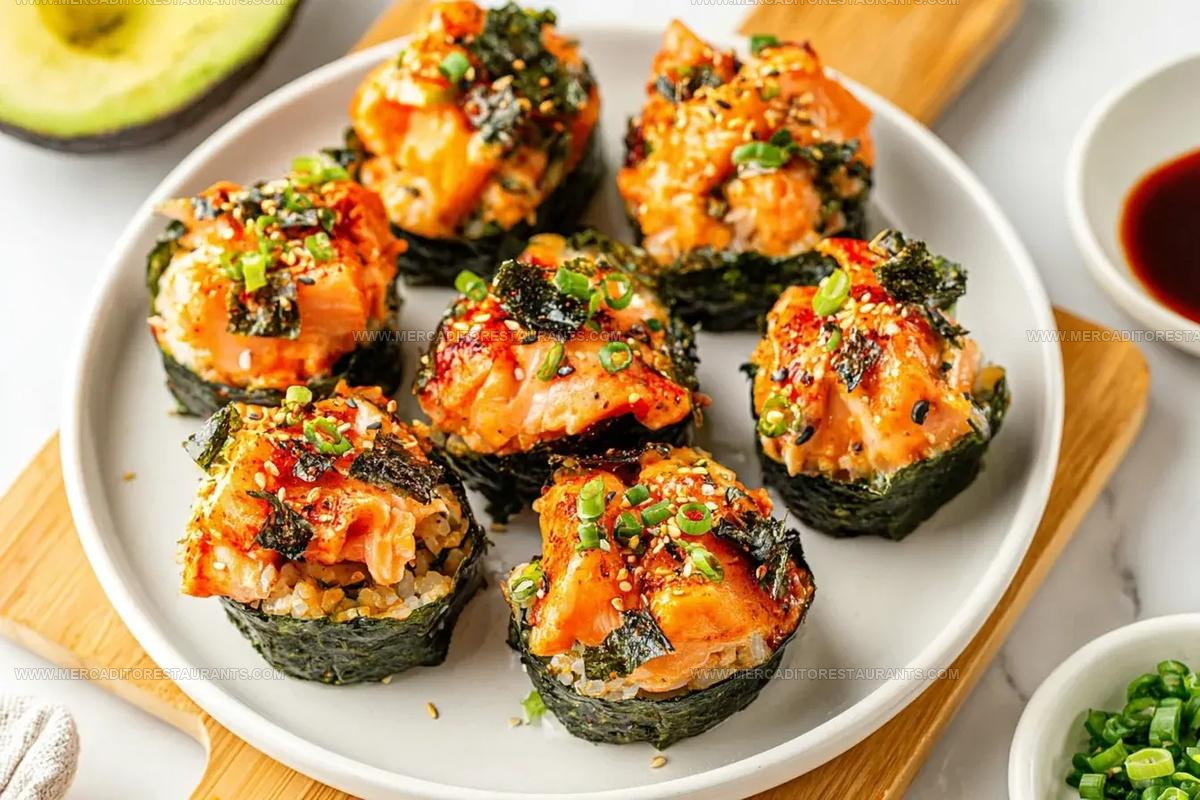
Baked Salmon Sushi Cups Recipe for Japanese-Inspired Bites
Baked salmon sushi cups offer an innovative twist on classic Japanese-inspired cuisine that will spark excitement at your next gathering.
Seafood enthusiasts and home cooks constantly seek creative ways to enjoy familiar flavors in unexpected formats.
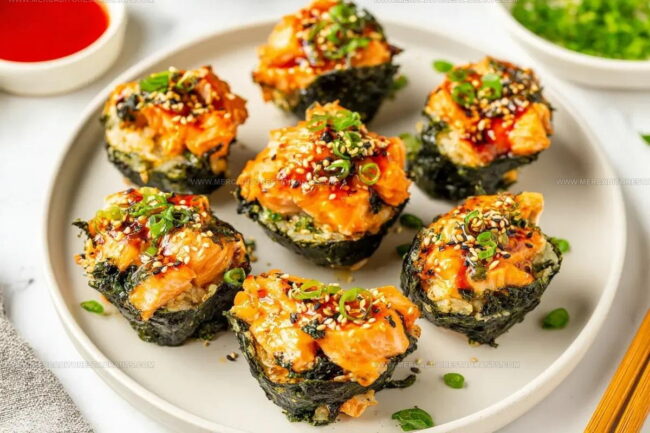
Stunning presentation meets delightful convenience with these compact, elegant bites that pack serious flavor into every morsel.
Perfect for casual parties or sophisticated appetizer spreads, these handheld delights combine comfort and elegance effortlessly.
Salmon lovers will appreciate the delicate balance between crispy edges and tender fish center that makes these cups so memorable.
Home chefs can easily master this playful recipe that looks impressive but requires minimal technical skill.
What Makes Baked Salmon Sushi Cups So Special
Ingredient List For Salmon Sushi Cups
Salmon Mixture:Rice Base:Garnish and Wrapper:Essential Kitchen Tools for Baked Salmon Sushi Cups
How to Make Baked Salmon Sushi Cups
Prep the Oven
Heat your oven to 400°F. Grab a muffin tin and give it a quick spray of cooking oil so nothing sticks.
Mix Salmon Goodness
Grab a mixing bowl and toss in your salmon cubes. You’ll want to add these ingredients:
Stir everything together until the salmon looks glossy and well-coated. Pop the bowl in the refrigerator while you tackle the next steps.
Perfect the Rice
Take your warm cooked rice and sprinkle in:
Mix thoroughly so the rice gets a nice, tangy flavor throughout.
Create Nori Bases
Cut your nori sheets into small squares that fit nicely inside each muffin cup. Press a square into each tin, creating a little edible liner.
Rice Layer
Scoop 1-2 spoonfuls of your seasoned rice into each nori-lined cup. Use your fingers to gently press the rice down and create a solid base.
Top with Salmon
Spoon your chilled salmon mixture onto the rice in each cup. Make sure each gets a generous portion.
Bake to Perfection
Slide the muffin tin into the 400°F oven. Bake for exactly 15 minutes until the salmon looks cooked and the nori edges turn crispy.
Final Touches
Sprinkle these on top of each cup:
Drizzle with extra spicy mayo if you want an extra kick. Serve these little bites warm and watch them disappear!
Extra Kitchen Insight For Salmon Sushi Cups
What New Spins Enhance Salmon Sushi Cups
How To Present Salmon Sushi Cups
Simple Storage Guide For Salmon Sushi Cups
Salmon Sushi Cups Questions Answered
Can I use another type of fish instead of salmon?
Absolutely! Tuna, trout, or even cooked shrimp work wonderfully in these sushi cups. Just make sure your fish is fresh and diced into small, uniform pieces.
Do I need special equipment to make these?
Not at all. A standard muffin tin and basic kitchen tools are all you need. The beauty of this recipe is its simplicity and accessibility.
How spicy are these sushi cups?
The spice level depends on how much sriracha you add. Start with a small amount and taste as you go. You can always increase the heat to match your preference.
Can these be made ahead of time?
These are best served fresh and warm, right out of the oven. Prep your ingredients in advance, but assemble and bake just before serving for the crispiest nori and most delicious texture.
What if I can’t find Kewpie mayo?
Regular mayonnaise works fine. Kewpie has a richer, tangier flavor, but your sushi cups will still taste great with standard mayo.

Bite-Size Baked Salmon Sushi Cups Recipe
- Total Time: 30 minutes
- Yield: 4 1x
Description
Salmon sushi cups bring delightful Japanese-inspired flavors right to your kitchen table, turning simple ingredients into a quick and elegant meal that will impress your dinner guests. With crispy wonton wrappers filled with seasoned salmon, creamy avocado, and zesty sriracha mayo, these bite-sized treats make entertaining a breeze.
Ingredients
Main Ingredients:
- ½ lb fresh salmon
- 1 cup cooked sushi rice
- 6 nori sheets
Flavor Enhancers:
- 1 tablespoon soy sauce
- 1 tablespoon Kewpie mayo
- 1 teaspoon sriracha
- 1 teaspoon sesame oil
- 1 tablespoon rice vinegar
- 1 teaspoon sugar
Garnishes:
- 1 tablespoon furikake
- 2 green onions
- Optional: extra spicy mayo or sriracha
- Optional: sesame seeds
Instructions
- Preheat your oven to 400°F and grease a 6-cup muffin tin thoroughly with cooking spray or butter.
- Dice ½ lb salmon into tiny, uniform cubes measuring about ¼ inch in size.
- Mix salmon cubes with 1 tbsp soy sauce, 1 tbsp Kewpie mayo, 1 tsp sriracha, and 1 tsp sesame oil in a cold mixing bowl.
- Refrigerate salmon mixture while preparing rice to keep ingredients fresh and cool.
- Stir 1 tbsp rice vinegar and 1 tsp sugar into warm cooked sushi rice until evenly distributed.
- Cut 6 nori sheets into small squares that perfectly fit muffin tin compartments.
- Press one nori square into each greased muffin cup, creating a delicate liner.
- Spoon 1-2 tablespoons of seasoned rice into each nori-lined cup, gently pressing to form a compact base.
- Top each rice-filled cup with a generous spoonful of seasoned salmon mixture.
- Bake at 400°F for exactly 15 minutes until salmon looks opaque and nori edges crisp slightly.
- Sprinkle 1 tbsp furikake across cups after removing from oven.
- Garnish with 2 finely chopped green onions and optional sesame seeds.
- Drizzle with extra spicy mayo if desired before serving immediately while warm.
Notes
- Pick fresh salmon for the best flavor and texture in your sushi cups.
- Ensure your muffin tin is well-greased to prevent sticking and make removal easy.
- Let the salmon mixture marinate for 15-20 minutes to enhance the depth of seasoning.
- For a gluten-free version, swap soy sauce with tamari and use gluten-free nori sheets.
- Prep Time: 15 minutes
- Cook Time: 15 minutes
- Category: Baked
- Method: Baking
- Cuisine: Japanese
Nutrition
- Serving Size: 4
- Calories: 235 kcal
- Sugar: 2 g
- Sodium: 470 mg
- Fat: 10 g
- Saturated Fat: 1.5 g
- Unsaturated Fat: 7.5 g
- Trans Fat: 0 g
- Carbohydrates: 20 g
- Fiber: 1 g
- Protein: 18 g
- Cholesterol: 40 mg
Isabella Romero
Hospitality & Beverage Editor
Expertise
Cocktail Culture, Tequila and Mezcal Knowledge, Guest Experience Writing, Restaurant Trends, Event Dining Guides
Education
- Program: B.A. in Hospitality Management
- Focus: Studied hospitality through a program built around theory and application, with practical preparation for restaurant and guest-experience careers in Chicago’s hospitality industry.
Wine & Spirit Education Trust (WSET)Isabella brings together cocktails, food culture, social dining, and the thoughtful details that make a meal feel memorable. Her content blends atmosphere, flavor, and hospitality in a warm, polished style that helps readers connect with the full dining experience, from the first sip to the last bite.