Baked Cheese Buns Recipe With Gooey Centers
Baked cheese buns are the kind of food that fills a kitchen with warmth and introduces smiles to everyone who catches that first whiff.
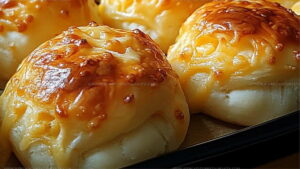
Soft, pillowy, and packed with savory goodness, they work beautifully as a snack, breakfast treat, or party addition.
There's something about pulling apart a golden-topped bun that feels comforting and satisfying all at once.
They're simple enough for weekday mornings but impressive enough for gatherings.
Fresh from the oven, they taste best while still warm and slightly gooey inside.
If you love bread that's both fluffy and flavorful, this recipe fits perfectly into any mealtime occasion.
Everything about them feels homemade in the best possible way, and the aroma alone makes them worth baking right now.
Why Baked Cheese Buns Are Worth Baking
Baked Cheese Buns Essential Ingredients
Dry Ingredients:Wet Ingredients:Flavor Boosters:Optional Toppings:Equipment Required for Baked Cheese Buns
Irresistible Baked Cheese Buns Preparation
Activate the Yeast
Grab a large bowl and pour in 1 cup (240ml) of warm milk at 110F. Sprinkle 2 tbsp granulated sugar and 1 packet (2 1/4 tsp) of active dry yeast into the milk. Let this mixture sit for 5-10 minutes until it gets super foamy. This tells you the yeast is ready to work its magic.
Mix the Initial Dough
Time to build your dough foundation. Toss in these ingredients:
Stir everything together until it starts to come together. Gradually mix in the remaining 1 1/2 cups of flour until a soft dough forms.
Knead the Dough
Dust your countertop with a bit of flour and dump out the dough. Knead it for about 8 minutes, pushing and folding until the dough becomes smooth and stretchy. If your arms get tired, a stand mixer with a dough hook works great for 5-6 minutes.
First Rise
Grease a clean bowl and plop your dough inside. Cover it with a kitchen towel and find a cozy, warm spot in your kitchen. Let the dough rise for 1 hour, or until it doubles in size.
Prepare the Cheese Buns
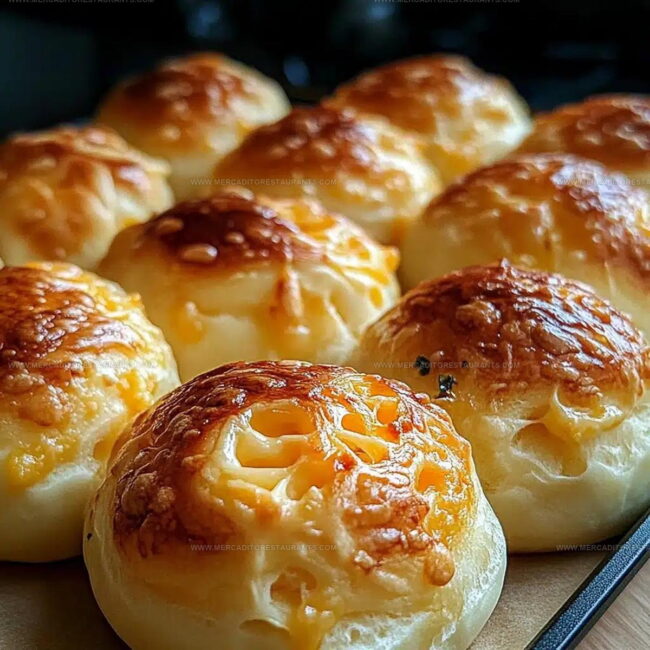
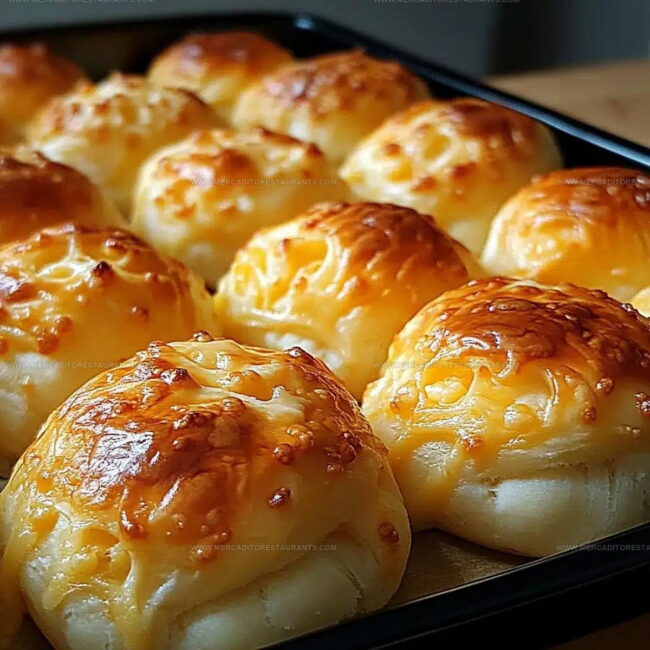
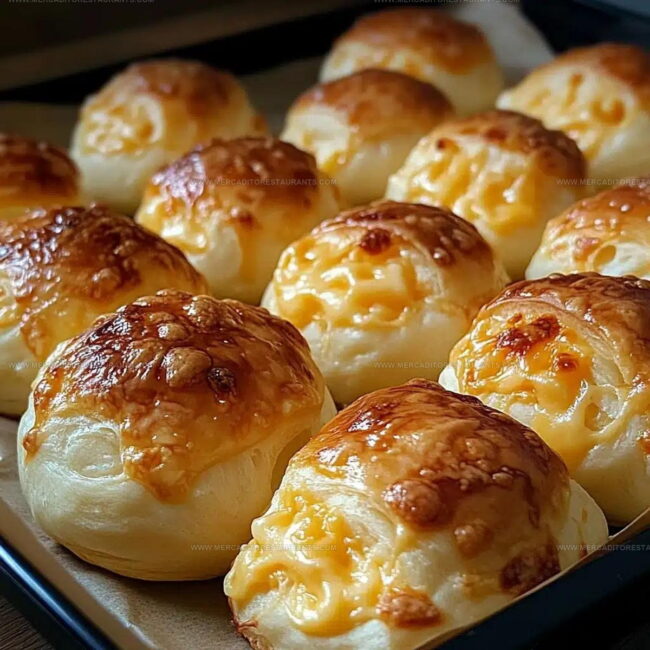
Punch down the puffy dough and divide it into 12 equal pieces. Flatten each piece into a small circle. Add a delicious cheese center:
Fold the dough around the cheese, pinching to seal. Roll gently into a ball and place seam-side down on a lined baking sheet.
Second Rise
Cover the buns loosely with a towel and let them puff up again for 25-30 minutes.
Bake the Buns
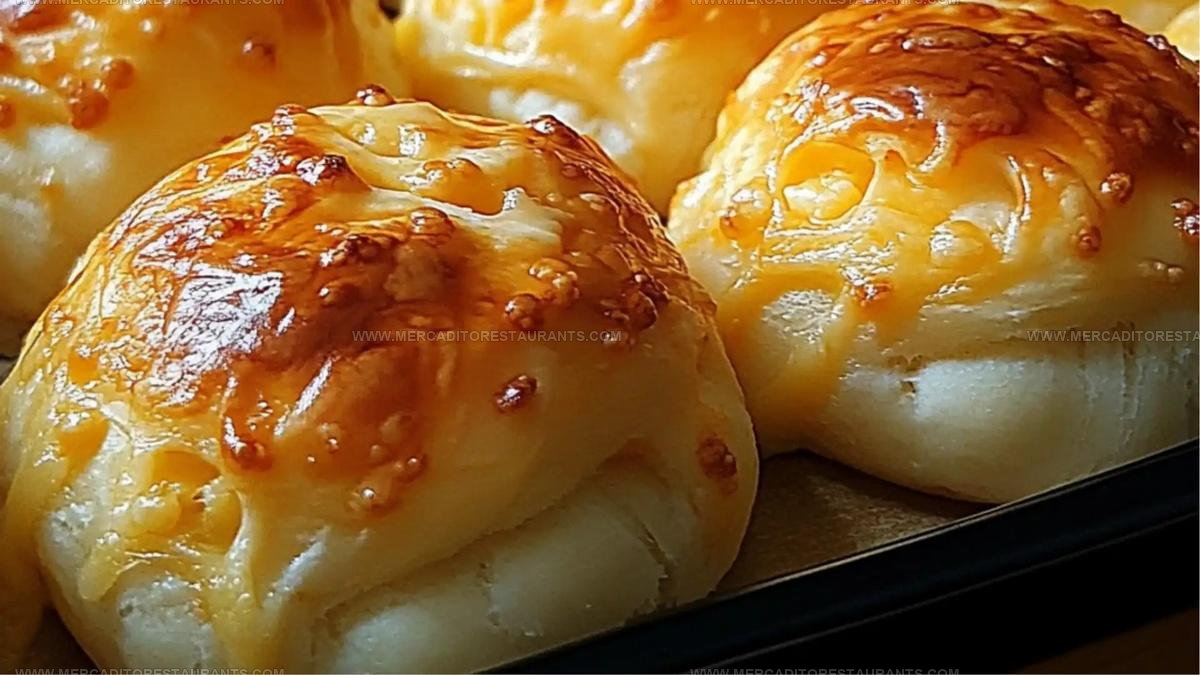
Crank your oven to 375°F (190°C). Brush each bun with 2 tbsp melted butter. Sprinkle with extra cheese or seasonings if you’re feeling fancy. Bake for 18-22 minutes until they turn a beautiful golden brown.
Serve and Enjoy
Let the buns cool slightly on a wire rack. Serve them warm – they’re perfect alongside soup, with a pat of butter, or just grabbed straight from the pan.
Smart Kitchen Notes for Homemade Baked Cheese Buns
Flavor Options for Baked Cheese Buns
What Are the Best Ways to Enjoy Baked Cheese Buns
Best Storage Practices For Baked Cheese Buns
Answers To Common Questions for Cheese Buns
Can I use different types of cheese?
Absolutely! Cheddar, mozzarella, or even a blend works perfectly. Choose a cheese that melts well and matches your flavor preference.
What if my dough doesn’t rise?
Check your yeast’s freshness and ensure the liquid is warm, not hot. A draft-free, warm spot helps the dough rise properly.
How do I know when the dough is kneaded enough?
The dough should feel smooth, elastic, and spring back when gently pressed. It shouldn’t stick to your hands or the surface.
Can these cheese buns be made ahead of time?
Yes! Prepare the dough, shape the buns, and refrigerate overnight. Let them come to room temperature and rise before baking.
Is a stand mixer necessary for making the dough?
Not at all. Hand-kneading works great and can be a fun, tactile experience. Just be patient and consistent with your technique.
What if I don’t have a warm spot for rising?
Place the covered dough in an oven with the light on, or near a warm appliance like a dishwasher.
Baked Cheese Buns Recipe
- Total Time: 2 hours
- Yield: 8 1x
Description
Warm Cheese Buns straight from the oven make your kitchen smell incredible and your taste buds dance with pure comfort. These golden parcels of cheesy goodness deliver a simple pleasure that turns an ordinary meal into something special.
Ingredients
Main Ingredients:
- 3.5 cups all-purpose flour
- 1.5 cups shredded cheese
- 1 cup warm milk
- 1 large egg
Supporting Ingredients:
- 2 tablespoons unsalted butter, softened
- 2 tablespoons melted butter
- 2 tablespoons granulated sugar
Seasoning and Leavening:
- 1 packet active dry yeast
- 1 teaspoon salt
- Optional: garlic powder
- Optional: parsley
- Optional: sesame seeds
Instructions
- Activate the yeast by mixing 1 cup (240ml) warm milk at 110F, 2 tbsp sugar, and 1 packet of yeast. Wait 5-10 minutes until the mixture becomes foamy.
- Add 2 tbsp softened butter, 1 large egg, 1 tsp salt, and 2 cups of flour to the yeast mixture. Stir until combined, then gradually incorporate the remaining 1 ½ cups flour to create a soft dough.
- Transfer the dough to a floured surface. Knead for 8 minutes until the texture becomes smooth and stretchy. Your dough should feel elastic and not stick to your hands.
- Grease a large bowl and place the dough inside. Cover with a clean towel and let it rise in a warm spot for 1 hour, or until the volume doubles.
- Deflate the risen dough and divide it into 12 equal portions. Flatten each piece into a small circle and place 1 tbsp of shredded cheese in the center.
- Fold the dough around the cheese, pinching the edges to seal completely. Roll gently into a smooth ball with the seam facing down on a lined baking sheet.
- Loosely cover the buns with a towel. Allow them to rise again for 25-30 minutes in a warm area.
- Heat the oven to 375F. Brush each bun with 2 tbsp melted butter and sprinkle with optional seasonings or extra cheese.
- Bake for 18-22 minutes until the buns turn golden brown and look puffy.
- Remove from the oven and let them cool slightly on a wire rack. Serve warm and enjoy immediately.
Notes
- Kneading develops gluten, which gives these cheese buns their soft, stretchy texture, so take time to work the dough thoroughly.
- Room temperature ingredients help create a smoother dough and ensure even rising, so let butter and egg sit out before starting.
- For a gluten-free version, swap wheat flour with a cup-for-cup gluten-free blend and add xanthan gum to help bind the dough.
- Experiment with different cheese fillings like sharp cheddar, feta, or pepper jack to customize the flavor of your buns.
- Prep Time: 1 hour 40 minutes
- Cook Time: 18-22 minutes
- Category: Baked
- Method: Baking
- Cuisine: American
Nutrition
- Serving Size: 8
- Calories: 256 kcal
- Sugar: 3 g
- Sodium: 271 mg
- Fat: 11 g
- Saturated Fat: 6 g
- Unsaturated Fat: 4 g
- Trans Fat: 0.2 g
- Carbohydrates: 28 g
- Fiber: 1 g
- Protein: 11 g
- Cholesterol: 52 mg
Isabella Romero
Hospitality & Beverage Editor
Expertise
Cocktail Culture, Tequila and Mezcal Knowledge, Guest Experience Writing, Restaurant Trends, Event Dining Guides
Education
- Program: B.A. in Hospitality Management
- Focus: Studied hospitality through a program built around theory and application, with practical preparation for restaurant and guest-experience careers in Chicago’s hospitality industry.
Wine & Spirit Education Trust (WSET)Isabella brings together cocktails, food culture, social dining, and the thoughtful details that make a meal feel memorable. Her content blends atmosphere, flavor, and hospitality in a warm, polished style that helps readers connect with the full dining experience, from the first sip to the last bite.