
Warm Cinnamon Baked Apples Recipe
Baked apples fill any kitchen with warmth and comfort during cool evenings when something simple yet satisfying sounds just right.
The natural sweetness intensifies beautifully in the oven, creating soft textures and caramelized edges that feel like a hug on a plate.
Families have enjoyed this classic dessert for generations because it feels special without requiring much fuss or time.
Something wonderful happens when fruit transforms from crisp and fresh to tender and aromatic, offering pure coziness in every spoonful.
It works perfectly as a weeknight treat, holiday side, or anytime dessert that pleases every palate at the table.
Minimal effort leads to maximum flavor, proving that homestyle cooking can be both effortless and memorable.
Nothing beats pulling a bubbling pan from the oven and watching everyone gather around for their first warm bite.
Cozy Highlights Of Baked Apples
Core Ingredients for Baked Apples
Fruit Base:Filling Ingredients:Spice Blend:Optional Mix-Ins:Baking Liquid:Essential Kitchen Tools for Baked Apples
Simple Way to Prepare Baked Apples
Prepare the Filling
Grab a mixing bowl and blend 3 tablespoons softened butter with 1/4 cup brown sugar, 1/2 teaspoon cinnamon, and 1/8 teaspoon nutmeg until smooth. The mixture should look creamy and well combined.
Stir in 1/4 cup rolled oats and your favorite extras like raisins or chopped nuts. Set the filling aside while you prep the apples.
Prepare the Apples
Wash 4 large apples and dry them completely. Using a sharp paring knife, carefully core each apple, removing seeds and creating a deep cavity for the filling. Make sure not to cut through the bottom of the apple.
Fill the Apples
Stuff each apple generously with the prepared filling, pressing it down and mounding it slightly on top. Your apples should look plump and overflowing with the delicious mixture.
Set Up for Baking
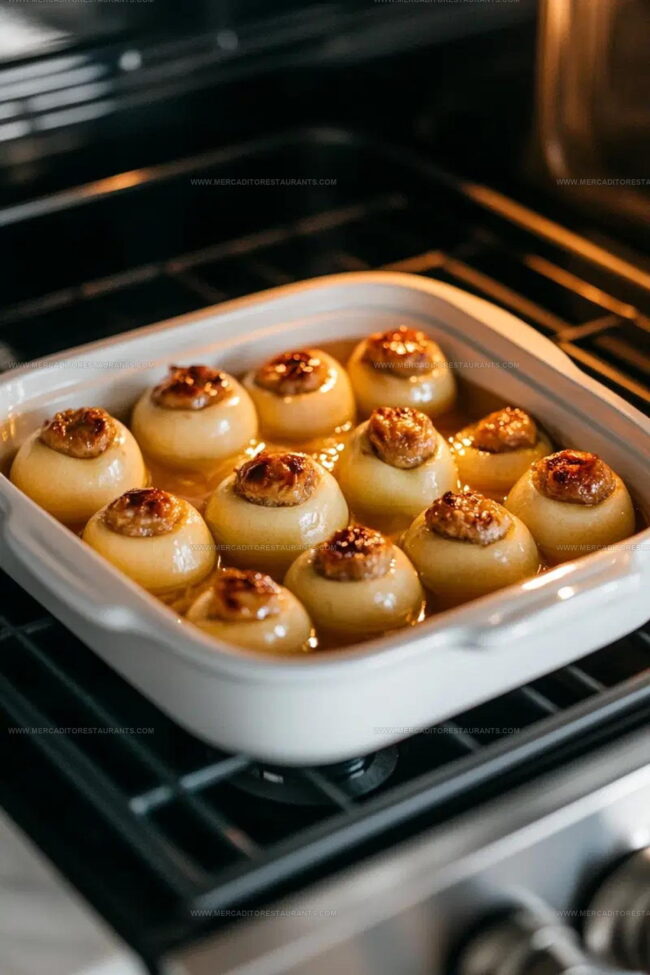
Place the filled apples in an 8-inch baking dish. Pour 3/4 cup warm water around the base of the apples to keep them moist during baking.
Bake the Apples
Preheat the oven to 375°F. Slide the baking dish into the oven and bake for 40-45 minutes. The apples are ready when they’re tender and can be easily pierced with a fork.
Serve and Enjoy
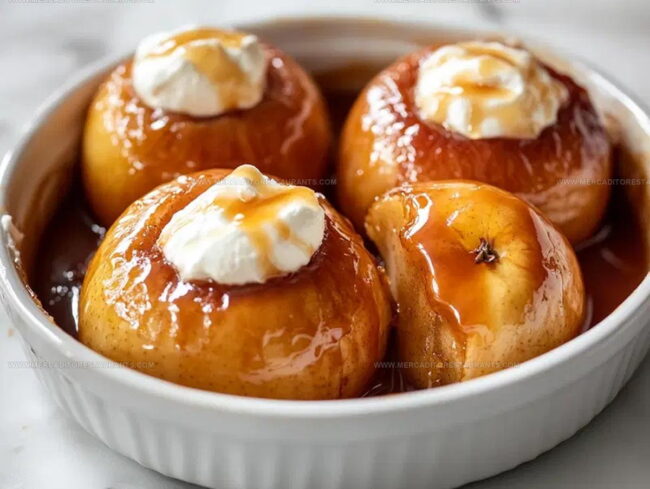
Remove the baked apples from the oven and let them cool for a few minutes. Serve warm with a dollop of whipped cream or a scoop of vanilla ice cream. These treats are best enjoyed fresh but can be stored in the refrigerator for up to 2 days.
Key Cooking Insights for Baked Apples
Simple Variations for Baked Apples
Simple Serving Ideas for Baked Apples
How To Store Baked Apples
Baked Apples FAQs
Can I use green apples instead of red ones?
Granny Smith apples work great! They’re tart and firm, which helps them hold their shape during baking. Just adjust the sugar slightly since green apples are more sour.
How do I know when the apples are fully baked?
The apples are done when they look soft and can be easily pierced with a fork. The skin will look slightly wrinkled and slightly darker.
What if I don’t have oats for the filling?
No problem! You can substitute crushed graham crackers or breadcrumbs. They’ll help bind the filling and add a nice texture to your baked apples.
Can these be made ahead of time?
Definitely! Prepare the apples and filling earlier in the day, then bake when ready to serve. They reheat wonderfully and taste just as delicious.
Are baked apples considered healthy?
They’re healthier than many desserts. Apples provide fiber, and you can control the sugar amount. Plus, they’re packed with natural fruit nutrients.

Baked Apples Recipe
- Total Time: 55 minutes – 1 hour
- Yield: 4 1x
Description
Classic Baked Apples turn simple orchard fruits into a comforting dessert that feels like a warm hug from grandma’s kitchen. Seasoned with cinnamon and sweet brown sugar, these tender apples will become your new favorite autumn treat.
Ingredients
Main Ingredients:
- 4 large apples
Filling Ingredients:
- ¼ cup brown sugar
- ¼ cup old-fashioned whole rolled oats
- 3 tablespoons unsalted butter
Spices and Optional Add-Ins:
- ½ teaspoon ground cinnamon
- ⅛ teaspoon ground nutmeg
- 2 tablespoons raisins
- ¾ cup warm water
Instructions
- Preheat your oven to 375°F and grab a baking dish that will comfortably hold 4 large apples.
- In a mixing bowl, cream 3 tablespoons softened butter with ¼ cup brown sugar, ½ teaspoon cinnamon, and ⅛ teaspoon nutmeg until the mixture is smooth and uniform.
- Fold ¼ cup rolled oats and optional 2 tablespoons raisins into the butter mixture, creating a rustic filling that will nestle inside your apples.
- Using a sharp paring knife, carefully remove the core from each apple, creating a hollow cavity that reaches almost to the bottom without puncturing through.
- Generously pack the prepared butter and oat mixture into each apple’s cavity, pressing firmly to ensure the filling reaches every crevice.
- Arrange the stuffed apples in the baking dish and gently pour ¾ cup warm water around them, creating a moisture-rich environment for baking.
- Transfer the dish to the preheated 375°F oven and bake for 40-45 minutes, checking at the 40-minute mark for tender apples that yield easily when pierced with a fork.
- Remove from the oven and let the apples rest for 5 minutes before serving them warm with a dollop of whipped cream or a scoop of vanilla ice cream.
Notes
- Choose firm, baking-friendly apples like Honeycrisp, Granny Smith, or Braeburn that hold their shape during cooking.
- Core the apples carefully, leaving the bottom intact to prevent the filling from leaking out during baking.
- Adjust the sweetness by using different sugars like brown sugar, maple syrup, or honey for varied flavor profiles.
- For a gluten-free version, replace oats with chopped nuts or quinoa, and ensure all ingredients are certified gluten-free.
- Prep Time: 15 minutes
- Cook Time: 40-45 minutes
- Category: Baked
- Method: Baking
- Cuisine: American
Nutrition
- Serving Size: 4
- Calories: 180 kcal
- Sugar: 21 g
- Sodium: 90 mg
- Fat: 9 g
- Saturated Fat: 5 g
- Unsaturated Fat: 4 g
- Trans Fat: 0 g
- Carbohydrates: 28 g
- Fiber: 3 g
- Protein: 1 g
- Cholesterol: 25 mg
Isabella Romero
Hospitality & Beverage Editor
Expertise
Cocktail Culture, Tequila and Mezcal Knowledge, Guest Experience Writing, Restaurant Trends, Event Dining Guides
Education
- Program: B.A. in Hospitality Management
- Focus: Studied hospitality through a program built around theory and application, with practical preparation for restaurant and guest-experience careers in Chicago’s hospitality industry.
Wine & Spirit Education Trust (WSET)Isabella brings together cocktails, food culture, social dining, and the thoughtful details that make a meal feel memorable. Her content blends atmosphere, flavor, and hospitality in a warm, polished style that helps readers connect with the full dining experience, from the first sip to the last bite.